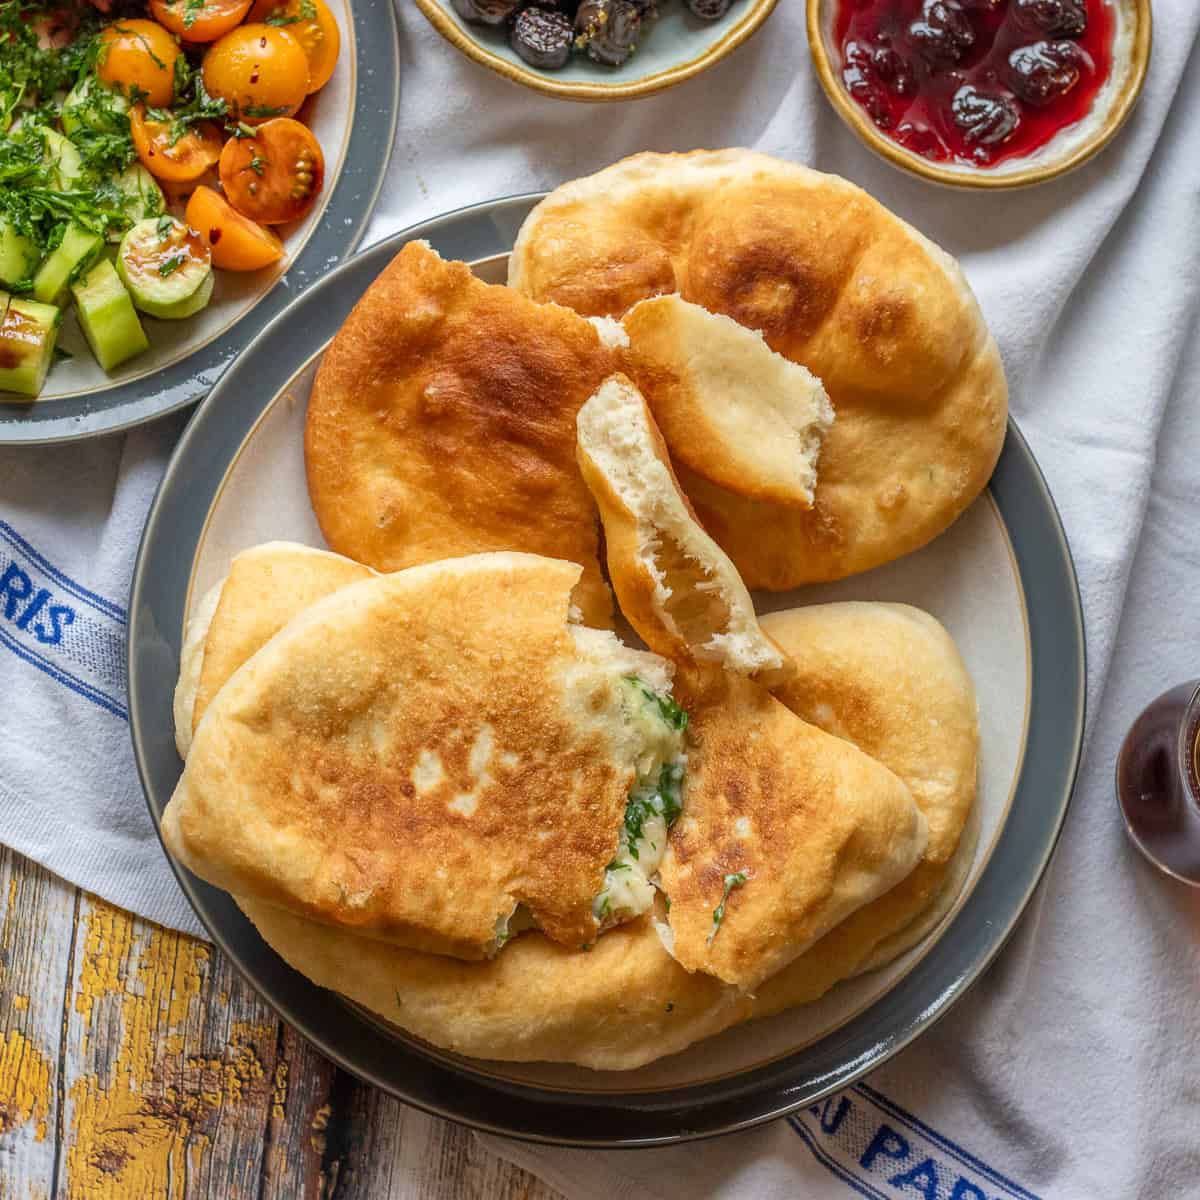
Su Boregi which means "Water Borek" is one of the most loved boreks in Turkey, and is by far the best of all Turkish Pastries.
Us Turks love these delicious savory treats and we eat them for breakfast, lunch, dinner, or as a snack any time of the day.

Jump to:
Free Turkish Dinner Ideas Guide
Need ideas for what to serve with Turkish meals? Get my free guide with 7 easy Turkish dinner ideas, including mains, sides, serving tips, and make-ahead notes.
Su Boregi has a reputation for being the most challenging borek to make. I have tried a few different ways over the years and finally have found what works best and is quicker.
Although it takes some time to put it together, it is very easy to make this unique borek and impress your guests. I also made a video to show you how to make this delightful borek easily at home.

Why This Recipe Works?
- You can easily make your homemade Su Boregi with step-by-step pictures, instructions, and a detailed video tutorial without needing a second person to help.
- These boreks freeze beautifully, you can keep them in the freezer for up to five months.
- You can make Su Boregi with meat if you prefer. You can check my other Borek recipes for meat-filling ideas - Kiymali Borek (Meat Borek) or Borek with Meat and Spinach.
- This Borek recipe gives around 22 pieces of borek, it is a crowd-pleaser!
Ingredients You'll Need
Please scroll down to the recipe card below for the full ingredients list with measurements, complete recipe method, recipe notes, and nutritional information.

- Strong white flour - It is also known as strong bread flour. It is made from hard wheat varieties and contains more gluten than other types of flour. It gives some elasticity to the dough which makes it easier to roll out. Adjust the amount of the flour until you reach a smooth but firm texture, the same as pasta dough.
- Eggs - I used 6 large eggs for this recipe. The size of the eggs will affect the amount of flour you use.
- Feta cheese - I prefer feta cheese made with sheep milk with high-fat content and a creamy texture.
- Butter - Use salted or unsalted. It adds great flavor and crispness to borek. Replace it with olive oil or vegetable oil if you prefer.
How to Make Su Boregi?
Making Su Boregi - Water Borek is a labour-intensive task for sure. However, it is not difficult to make them when you follow my step-by-step instructions, pictures, and the video on the recipe card.
Prepare the Filling
Crumble the feta cheese in a medium-sized bowl. Finely chop the parsley and add it to the cheese. Gently combine the cheese and parsley, and set them aside. In a separate bowl, mix the melted butter with ¼ cup of oil and set them aside.

Prepare the Dough
Place 2 tablespoon of vegetable oil, salt, and eggs in a large bowl and whisk until all is mixed. Add the flour gradually to the egg mixture and combine until it forms a dough. The amount of flour depends on the size of the eggs.
Knead the dough to form a smooth but firm dough using your hands or a stand mixer.

Divide the dough into 10 equal pieces and turn them into balls. Cover the balls with a damp cloth or cling film and let them rest for 15 to 20 minutes.

Roll Out the Yufka Sheets
Turn one of the small dough balls onto a lightly floured surface and roll it out into the size of a small plate, the size of 5" (12 cm). Sprinkle it with a generous amount of flour and set it aside.
Take another small dough ball and roll it out the same size as the first one. Place it on top of the first dough ball and sprinkle on some more flour.

Repeat until you have 3 dough balls rolled out and put them on top of each other, making sure there is plenty of flour in between them. Build another group of 3 dough balls and 4 dough balls the same way, and let them rest for 10 minutes.
You should have three groups of pastries made with three+three+four balls (10 in total).

Generously flour your kitchen top and start rolling out the pastry groups into larger-sized pastries, a size of 10" (25 cm). Make sure there is enough flour between the layers to avoid the pastries sticking to each other while rolling them out.

Let them rest for another 10 minutes before the last stage of rolling the pastries into yufka. Place a large pan filled with water on medium-high heat, and then add 1 tablespoon of salt and 1 tablespoon of oil. Bring the pan to a boil while finishing the yufka sheets.

For the final stage of rolling out the yufka sheets, dust your kitchen top with some flour. You will need a long rolling pin called "oklava" at that stage.
Place one of the pastries on your kitchen top and roll it out to the size of your baking pan, 14" (35cm) dia. Use a generous amount of flour to avoid it sticking. Fold it and set it aside. Cover it with a clean cloth and repeat the same for the remaining 9 pastries.

Blanch the Yufka Sheets
Prepare an ice-water bath in a large bowl and place it next to the boiling water. Spare two yufka sheets aside and then start blanching the remaining 8 yufka.
Pick one of the yufka, dust off the extra flour, gently lower it into boiling water, and press to submerge. Depending on the size of your pan, you can blanch two or three yufka sheets at the same time.

Simmer them for 30 to 40 seconds, remove them carefully using a sieve or a slotted spoon, and drop them into the ice-cold water.
You might need to change the ice-cold water a few times during the process to make sure you have very cold water for each piece of yufka sheets.

When the yufka sheets are cooled down, lift them with your hands, and lay them onto the strainer to get rid of the water. When you have 4 yufka sheets blanched and cooled down, start building the borek.
Build the Borek
Brush your baking tray with a generous amount of melted butter. Place one of the "uncooked" yufka sheets on the tray and brush it with melted butter.

On top of the uncooked yufka, place one of the blanched yufka carefully. The blanched yufka will be much larger, so you will need to shrink it to the size of the pan. Brush it with a generous amount of butter.

Repeat the same with the remaining three blanched yufka sheets and spread the cheese filling evenly.

Preheat your oven to 360° F (180° C) before proceeding to blanch the rest of the sheets. Blanch, cool down, and drain the rest of the 4 yufka sheets the same way to finish building the borek.
Layer the 4 blanched yufka sheets on top of the filling, brushing generously in between the sheets. Place the second "uncooked" yufka sheet that you spared on top and brush it with the remaining melted butter-oil mixture.

Cook the borek for 45 to 50 minutes, until the bottom and the top, are both nicely browned and crispy. Let it rest for 15 minutes before portioning and serving.

Recipe Tips From the Chef
- The consistency of the dough is the key to success in this recipe. The amount of flour given in the recipe card should be taken as a guide. Adjust the amount of the flour until you achieve the right texture, which is smooth but firm, the same as pasta dough consistency.
- Make sure there is enough flour between the layers to avoid the pastries sticking to each other while rolling them out.
- You might need to change the ice-cold water a few times during the process to make sure you have very cold water for each piece of yufka sheets.
Free Turkish Dinner Ideas Guide
Need ideas for what to serve with Turkish meals? Get my free guide with 7 easy Turkish dinner ideas, including mains, sides, serving tips, and make-ahead notes.
Serving Suggestions
The most traditional way to serve these scrumptious pastries is to serve them with a cup of Turkish tea or a glass of refreshing Ayran (Turkish Yogurt Drink)!
You can also serve Su Boregi with a bowl of refreshing salad such as Turkish Shepherd Salad (Coban Salatasi), Gavurdagi Salatasi (Tomato and Walnut Salad), or Greek Cucumber Salad.
Recipe FAQs
Yes, you can prepare it up to 3 days in advance and keep it refrigerated until you want to bake it.
You can store the leftovers refrigerated for up to a week in an airtight container. Alternatively, you can freeze them and keep them for up to five months!
Related Recipes
For more delicious homemade Turkish Pastries why not try:


Did you make this recipe? Please let me know how it turned out! Leave a comment below and tag @cookingorgeous on Instagram and hashtag it #cookingorgeous.
I hope you enjoy the process of making this delicious Su Boregi - Water Borek as much as you enjoy eating it! 🙂
Bon appétit! / Afiyet olsun!
Want to Save This Recipe?
Enter your email & I'll send it to your inbox. Plus, get great new recipes from me every week!
By submitting this form, you consent to receive emails from Cooking Gorgeous

Su Boregi - Water Borek
Equipment
- 1 kitchen scale
- 1 measuring spoons
- 1 Measuring cups
- 1 Sharp knife
- 1 Pastry brush
- 1 ince oklava
- 1 Rolling Pin
Ingredients
For the Filling
- 2 cups crumbled feta cheese (500 grams)
- ½ cup parsley (chopped)
For the Layers
- 1 cup melted butter (200 grams)
- ¼ cup vegetable or sunflower oil
For the Pastry
- 6 large eggs
- 1 ½ teaspoon salt
- 2 tablespoon vegetable or sunflower oil
- 3 ¾ cups strong white flour for the dough (450 grams)
- ⅓ cup strong white flour for rolling out the pastries (50 grams)
For Cooking the Pastries
- 1 large pot of water
- 1 tablespoon salt
- 1 tablespoon vegetable or sunflower oil
Instructions
Preparing the Filling
- Crumble the feta cheese in a medium-sized bowl.
- Finely chop the parsley and add it to the cheese.
- Gently combine the cheese and parsley, and set them aside.
- In a separate bowl, mix the melted butter with ¼ cup of oil and set them aside.
Preparing the Dough
- Place 2 tablespoon of vegetable oil, salt, and eggs in a large bowl and whisk until all is mixed.
- Add the flour gradually to the egg mixture and combine until it forms a dough. The amount of flour depends on the size of the eggs.
- Knead the dough to form a smooth but firm dough using your hands or a stand mixer.
- Divide the dough into 10 equal pieces and turn them into balls.
- Cover the balls with a damp cloth or cling film and let them rest for 15 to 20 minutes.
Rolling out the Yufka
- Turn one of the small dough balls onto a lightly floured surface and roll it out into a size of small plate, the size of 12 cm (5"). Sprinkle it with a generous amount of flour and set it aside.
- Take another small dough ball and roll it out the same size as the first one. Place it on top of the first dough ball and sprinkle on some more flour.
- Repeat until you have 3 dough balls rolled out and put them on top of each other, making sure there is plenty of flour in between them.
- Build another group of 3 dough balls and 4 dough balls the same way, and let them rest for 10 minutes. You should have three groups of pastries made with three +three+four balls (10 in total).
- Generously flour your kitchen top and start rolling out the pastry groups into larger sizes pastries, size of 25 cm (10"). Make sure there is enough flour between the layers to avoid the pastries sticking to each other while rolling them out.
- Let them rest for another 10 minutes before the last stage of rolling the pastries into yufka.
- Place a large pan filled with water on medium-high heat and add 1 tablespoon of salt and 1 tablespoon of oil.
- Bring the pan to a boil while finishing the yufka sheets.
- For the final stage of rolling out the yufka sheets, generously flour your kitchen top. You will need a long rolling pin called "oklava" at that stage.
- Place one of the pastries on your kitchen top and roll it out to the size of your baking pan, 35 cm (14") dia. Use a generous amount of flour to avoid it sticking. Fold it into four and set it aside. Cover it with a clean cloth and repeat the same for the remaining 9 pastries.
Blanching the Yufka Sheets
- Prepare an ice-water bath in a large bowl and place it next to the boiling water.
- Spare two yufka sheets aside and start blanching the remaining 8 yufka.
- Pick one of the yufka, dust off the extra flour, gently lower it into boiling water, and press to submerge. Depending on the size of your pan, you can blanch two or three yufka sheets at the same time.
- Simmer them for 30 to 40 seconds, remove them carefully using a sieve or a slotted spoon and drop them into the ice-cold water. You might need to change the ice-cold water a few times during the process to make sure you have very cold water for each piece of yufka sheets.
- When the yufka sheets are cooled down, lift them with your hands, and lay them onto the strainer to get rid of the water.
- When you have 4 yufka sheets blanched and cooled down, start building the borek.
Building the Borek
- Brush your baking tray with a generous amount of melted butter.
- Place one of the "uncooked" yufka sheets on the tray and brush it with melted butter.
- On top of the uncooked yufka, place one of the blanched yufka carefully. The blanched yufka will be much larger so you will need to shrink it to the size of the pan. Brush it with a generous amount of butter.
- Repeat the same with the remaining three blanched yufka sheets and spread on the cheese filling evenly.
- Preheat your oven to 180° C (360° F) before proceeding to blanch the rest of the sheets.
- Blanch, cool down, and drain the rest of 4 yufka sheets the same way to finish building the borek.
- Layer the 4 blanched yufka sheets on top of the filling, brushing generously in between the sheets.
- Place the second "uncooked" yufka sheet that you spared on the top and brush it with the remaining melted butter-oil mixture.
- Cook the borek for 45 to 50 minutes, until the bottom and the top, are both nicely browned and crispy.
- Let it rest for 15 minutes before portioning and serving.
Video
Notes
- The consistency of the dough is the key to success in this recipe. The amount of flour given in the recipe card should be taken as a guide. Adjust the amount of the flour until you achieve the right texture, which is smooth but firm, the same as pasta dough consistency.
- Make sure there is enough flour between the layers to avoid the pastries sticking to each other while rolling them out.
- You might need to change the ice-cold water a few times during the process to make sure you have very cold water for each piece of yufka sheets.
- You can store the leftovers refrigerated for up to a week in an airtight container. Alternatively, you can freeze them and keep them for up to five months!
Nutrition
This post uses affiliate links. This means that if you click on them and then buy something, we get a small amount of commission to keep the site running, but it doesn’t cost you anything more.


Melissa says
Have you ever tried to make this recipe with premade phyllo sheets?
Ayla Clulee says
Hi Melissa, no I haven’t tried that because filo sheets or yufka wouldn’t hold up in water — they’d just fall apart right away. Lasagna sheets could work better, but the result wouldn’t quite be the same.
Deanna Hemenway says
Wondering what happened to the video? Was looking forward to watching it after reading all the instructions…. I love trying new things.
Ayla Clulee says
Hi Deanna,
The video is on the recipe card, right after the instructions and before the nutrition information. You can also use the jump to video button on the top of the page. Hope that helps.
Best wishes
Ayla
Aisha says
It was nearly 3 hours from start to finish, but well worth the effort. Absolutely delicious!
Shereen says
Tried this Water Borek recently and everything turned out well, even my 1st attempt at making filo pastry was successful. Can’t wait to make it again, thanks!
Avi says
This was absolutely delicious. I used a feta, mozzarella, mint mix. I don’t think you could get anything more tasty or authentic at a restaurant. The family was very impressed!
Delia says
A little fiddly but definitely worth it! I was so proud of my self for the way this turned out.
Ayla Clulee says
Hi, Delia! Glad you enjoyed this recipe!
Best wishes
Ayla x
Linda says
This was such a delicious recipe! It wasn’t as hard to do as I thought either. Can’t wait to make it again, thanks!