Try This Easy Homemade Guyanese Oil Roti Recipe for Perfect Flatbread With Flaky, Buttery Layers!
This easy homemade Guyanese Oil Roti Recipe is the key to creating the perfect flatbread that will impress your friends and family. If you're a fan of delicious flatbreads like we are, I have another amazing and foolproof recipe just for you.

Jump to:
Whether you're an experienced cook or a beginner, this recipe will guide you through the process of making homemade roti that is soft, flaky, and full of flavor. Guyanese Roti has an exceptional texture and pairs perfectly with any meal or even enjoyed on its own.
I often serve this delicious flaky flatbread along with Dal Palak (Spinach Dal), Tandoori Chicken, Creamy Chicken Korma, or Et Sote (a delicious Turkish stir-fry dish made with beef strips, onions, tomatoes, garlic, and peppers).
What is Guyanese Oil Roti?
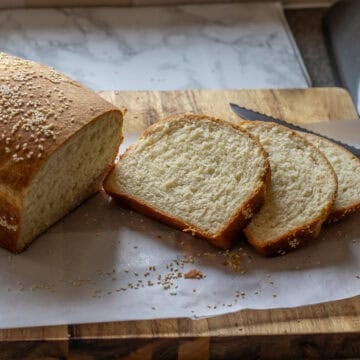
Guyanese Oil Roti, also known as Paratha Roti is a delicious and versatile flatbread that originates from Guyana, a country in South America but is also popular in India and other parts of the Caribbean Islands.
It has a soft, flaky texture and pairs well with various dishes from curries to soups, meat stews, and dips. To make Guyanese Oil Roti, you simply prepare a basic dough, roll it out, and cook it on a hot griddle or tawa with a drizzle of oil until it turns a beautiful golden-brown color.
Guyanese Oil Roti has a unique texture, like a cross between a crepe, a pie crust, and naan, resulting in deliciously flaky bread.
This thin and soft roti can be easily folded or rolled up, making it perfect for scooping up curries, vegetables, or any other fillings you desire. It's easy to make, incredibly delicious and brings a unique twist to your dining experience.

Why This Recipe Works?
- This Caribbean Roti recipe is straightforward and easy to follow, using simple everyday ingredients. The step-by-step instructions ensure that you achieve excellent results every time, whether you're an experienced cook or a beginner
- It is highly versatile, you have the freedom to customize and experiment according to your preferences.
- The combination of techniques and cooking methods ensures that you end up with roti that is light, airy, and wonderfully flaky.
- Its neutral yet subtly flavorful taste makes it a great accompaniment to different types of curries, and stews or enjoyed on its own.
Ingredients You'll Need
Please scroll down to the recipe card below for the full ingredients list with measurements, complete recipe method, recipe notes, and nutritional information.

- Flour - The best type of flour for Guyanese roti is plain white flour or all-purpose flour. Substituting it with other types of flour (such as whole wheat flour) will make the roti less soft and denser. You can also use strong white flour/bread flour if that's what you have in hand.
- Ghee - I prefer using ghee for oil roti as it has a more intense butter flavor than normal butter and it doesn’t burn even on high heat. However, you can also use a neutral-flavored oil like canola, vegetable, or sunflower oil.
- Baking Powder - It gives the roti some extra rise and creates air pockets and fluffiness.
- Yeast - I use a small amount of fast-action dry yeast for this recipe to make the roti softer.
How to Make Soft and Fluffy Guyanese Oil Roti?
You might find the idea of making your own roti flatbread at home daunting. The good thing is that this bread is straightforward to make when you follow a few simple steps:
Prepare the Dough
In a large bowl, combine the flour, salt, sugar, baking powder, and dry yeast. Mix well.

Add the warm water gradually to dry ingredients while stirring the mixture with a rubber spatula or your hands. Continue mixing until a slightly sticky and soft dough forms and knead it for about 5 minutes until the dough becomes smooth and elastic.

Cover the dough with a clean damp cloth and let it rest for about 20-25 minutes.

Let the Dough Rest and Shape the Rotis
After the dough has rested, divide it into 6 equal-sized portions and shape them into balls.

Take one dough ball and lightly dust it with flour. Roll it out into a thin, round shape using a rolling pin. If needed, you can dust the work surface and the dough with extra flour to prevent sticking.

Spread a thin layer of softened ghee or any other oil you want to use over the rolled-out dough.

Starting from one end, make a series of pleats by folding the dough like an accordion until you reach the other end.

Coil the pleated dough into a spiral shape and tuck the end underneath.


Gently press it down to flatten it slightly. Repeat the same steps for the remaining dough balls. Cover them with a damp kitchen cloth and allow them to rest for an additional 15-20 minutes
Cook the Rotis and Serve
Heat a tawa, cast iron skillet, or non-stick frying pan over medium heat. Take one dough ball at a time and place it on a lightly floured surface. Roll out the dough into a flat circle of about 20 cm (8 inches) in diameter.

Place one roti on the hot griddle and cook for about 30 seconds to 1 minute until air bubbles start to form on the surface. Flip the roti and cook the other side for another 30 seconds to 1 minute until it puffs up and gets light golden brown spots.

Remove the cooked roti from the griddle, hold it with a clean kitchen towel or tongs, and gently clap it between your hands. This helps to release any trapped steam, gives the roti flaky layers, and makes the roti more pliable and soft.

Repeat the cooking and clapping process for each roti as you cook them.

Top Tips From the Chef
- After kneading the dough, it's important to let it rest for a minimum of 20 minutes. This resting period allows the gluten to relax, making it easier to roll out the roti. If you find that the dough is resistant or springs back when rolling, it indicates that it needs to rest longer.
- When rolling out the roti, lightly dust the rolling surface and the dough with flour to prevent sticking. Roll the dough evenly to achieve a consistent thickness.
- Ensure that the ghee is softened at room temperature before spreading it on the rolled-out dough. This makes it easier to distribute and adds flavor to the roti.
- Cook each roti for about 30 seconds to 1 minute on each side. Look for bubbles and light golden brown spots as indicators that the roti is cooked and ready to be flipped.
- As you cook the rotis, keep them warm by stacking them in a clean kitchen towel or placing them in a covered container. This will also help to retain their softness and warmth.
What to Serve with Guyanese Oil Roti?
- Enjoy your roti with flavorful curries such as Butternut Squash and Chickpea Curry, Chicken Handi, or even Hyderabadi Mutton Biryani. The roti's soft texture is perfect for sopping up the delicious curry sauce.
- Serve roti with a side of Onion Raita, mint chutney, or mango chutney for added flavor and freshness. These dips complement the roti beautifully and add a delightful touch to each bite.
- Dal Palak (Spinach Dal) is another excellent accompaniment to roti. The creamy texture of dhal pairs wonderfully with the soft and flaky roti, creating a satisfying and comforting combination.

Storage and Reheating
If you have leftover rotis, store them in an airtight container or wrap them tightly in plastic wrap. You can keep them at room temperature for up to a day or in the fridge for a few days.
If you want to keep them longer, stack them with parchment paper in between each piece and store them in a freezer bag for up to 3 months.
If you prefer a quick reheating method, you can use a microwave. Wrap the roti in a damp paper towel to prevent it from drying out. Microwave on high for 20 to 30 seconds, or until the roti is warmed to your liking. Keep an eye on it to avoid overheating, as microwave times may vary.
Alternatively, you can use a tawa or a skillet to reheat your roti. Place a non-stick skillet or tawa on medium heat. Once the skillet is hot, add the roti and cook for about 30 seconds on each side. Flip the roti occasionally until it is heated through. Be careful not to overcook or burn it.
Recipe FAQs
Yes, you can substitute whole wheat flour for all-purpose flour.
Keep in mind that the texture and taste may vary slightly, as whole wheat flour tends to produce a denser roti.
You may need to adjust the amount of water used in the recipe to achieve the desired consistency.
Yes, you can make a version of Guyanese Oil Roti without yeast.
Simply omit the yeast from the recipe, and the roti will still turn out delicious.
However, note that the texture and rise of the roti may be slightly different without yeast.
Absolutely! You can adjust the size of the rotis according to your preference.
For smaller rotis, divide the dough into smaller portions and roll them out accordingly.
For larger rotis, use more dough and roll them out to a larger size.
Keep in mind that cooking times may vary based on the size of the roti.
Related Recipes
For more scrumptious flatbread recipes why not try:


Did you make this recipe? Please let me know how it turned out! Leave a comment below and tag @cookingorgeous on Instagram and hashtag it #cookingorgeous.
I hope you enjoy the process of making this flaky and buttery Easy Guyanese Oil Roti Recipe as much as you enjoy eating it! 🙂
Bon appétit! / Afiyet olsun!
Want to Save This Recipe?
Enter your email & I'll send it to your inbox. Plus, get great new recipes from me every week!
By submitting this form, you consent to receive emails from Cooking Gorgeous

Easy Guyanese Oil Roti Recipe
Equipment
- 1 kitchen scale
- 1 Rolling Pin
- 1 measuring spoons
- 1 Measuring cups
Ingredients
- 3 ½ cups plain white flour / all-purpose flour (420 grams)
- 2 teaspoon baking powder
- ¼ teaspoon fast action dry yeast
- 1 ¼ cups tepid water (300 ml)
- ½ teaspoon salt
- ½ teaspoon sugar
- 2 tablespoon ghee (softened at room temperature)
Instructions
Making the Dough
- In a large mixing bowl, combine the flour, salt, sugar, baking powder, and dry yeast. Mix well.
- Add the tepid water gradually while stirring the mixture with a spoon or your hands.
- Continue mixing until a soft and slightly sticky dough forms and knead it for about 5 minutes until the dough becomes smooth and elastic.
- Cover the dough with a clean kitchen towel and let it rest for about 20-25 minutes.
Resting the Dough and Shaping the Rotis
- After the dough has rested, divide it into 6 equal-sized portions and shape them into balls.
- Take one dough ball and lightly dust it with flour. Roll it out into a thin, round shape using a rolling pin. If needed, you can dust the rolling surface and the dough with additional flour to prevent sticking.
- Spread a thin layer of softened ghee or any other oil you want to use over the rolled-out dough
- Starting from one end, make a series of pleats by folding the dough like an accordion until you reach the other end.
- Coil the pleated dough into a spiral shape and tuck the end underneath.
- Gently press it down to flatten it slightly. Repeat the same steps for the remaining dough balls.
- Cover them with a damp kitchen cloth and allow them to rest for an additional 15-20 minutes.
Cooking and Serving
- Heat a tawa, griddle, or non-stick pan over medium heat.
- Take one dough ball at a time and place it on a lightly floured surface. Roll out the dough into a flat circle of about 20 cm (8 inches) in diameter.
- Place one roti on the hot griddle and cook for about 30 seconds to 1 minute until bubbles start to form on the surface.
- Flip the roti and cook the other side for another 30 seconds to 1 minute until it puffs up and gets light golden brown spots.
- Remove the cooked roti from the griddle, hold it with a clean kitchen towel or tongs, and gently clap it between your hands. This helps to release any trapped steam and makes the roti more pliable and soft.
- Repeat the cooking and clapping process for each roti as you cook them.
Video
Notes
- After kneading the dough, it's important to let it rest for a minimum of 20 minutes. This resting period allows the gluten to relax, making it easier to roll out the roti. If you find that the dough is resistant or springs back when rolling, it indicates that it needs to rest longer.
- When rolling out the roti, lightly dust the rolling surface and the dough with flour to prevent sticking. Roll the dough evenly to achieve a consistent thickness.
- Ensure that the ghee is softened at room temperature before spreading it on the rolled-out dough. This makes it easier to distribute and adds flavor to the roti.
- Cook each roti for about 30 seconds to 1 minute on each side. Look for bubbles and light golden brown spots as indicators that the roti is cooked and ready to be flipped.
- As you cook the rotis, keep them warm by stacking them in a clean kitchen towel or placing them in a covered container. This will also help to retain their softness and warmth.
Nutrition
This post uses affiliate links. This means that if you click on them and then buy something, we get a small amount of commission to keep the site running, but it doesn’t cost you anything more.


Bethany says
That went down so quick, I will surely double the recipe next time. Thank you for this delicious recipe.