Pogaca (Turkish Cheese Buns) is one of the most popular savory pastries in Turkey. Just like Fatayer - Homemade Lebanese Pies, they are perfect as a quick breakfast on the go, a tasty snack when you feel peckish, or a great addition to your kids' lunch box.

Jump to:
These delicious & cute feta dumplings are very similar to Bulgarian Pitka Bread (Koledna Pitka) and pair perfectly with a cup of Turkish Tea - Cay. The most popular version of Pogaca is the soft, fluffy one with feta cheese and herbs.
The other filling options are generally minced beef, olives, or potatoes but the plain ones are equally yummy.
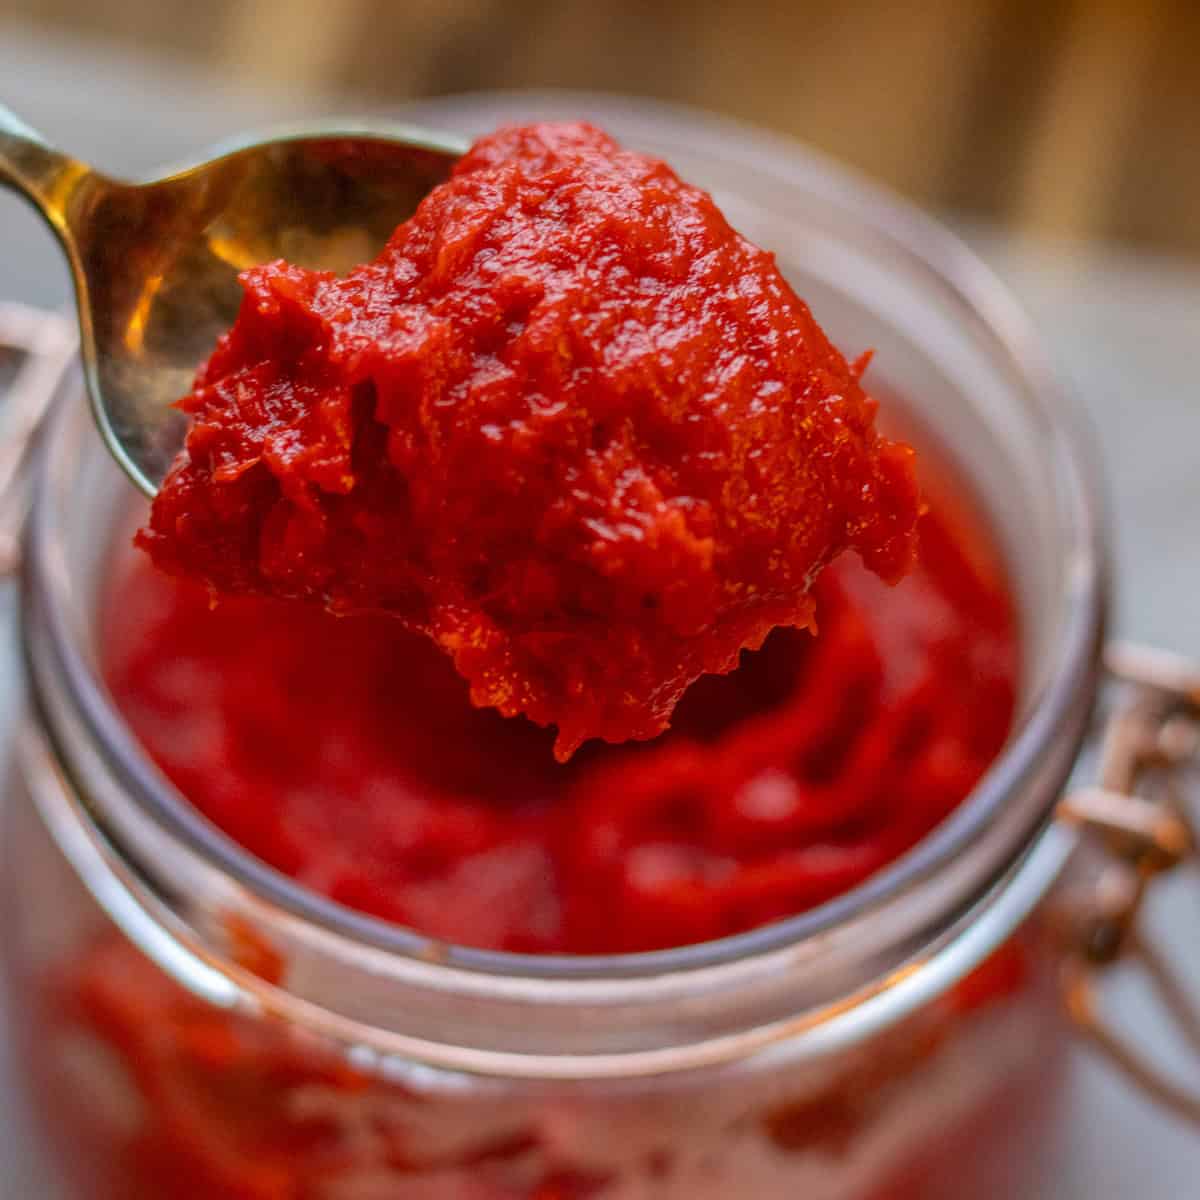
I sometimes make a few plain ones to eat with butter and homemade Rhubarb Jam or a bowl of Watermelon Feta Salad with Basil and Cucumber when they are warm out of the oven.
If you've never tried to make your own at home, try this simple yet delicious pogaca recipe. The only downside is that they are unbelievably addictive so you lose track of how many you've eaten!

What is Pogaca?
Pogaca (spelled Poğaça in Turkish) is a type of savory pastry baked in the oven, popular in Turkey and the Balkans. These delicious pastries can be leavened or unleavened and are generally made from wheat flour.
They are commonly sold in bakeries and they come in different flavors, shapes, and textures. While some Pogaca has a more crumbly texture like scones, others have a more soft and fluffy texture to them.
Why This Recipe Works?
- Pogaca freezes beautifully. Let them cool down before putting them in the freezer. They keep frozen for up to 3 months.
- It is very easy to make these Turkish cheese pastries with step-by-step pictures and instructions.
- You don't need to rise the dough twice, simply make the dough, shape it, let it rise, and bake the Pogaca until golden.
- To make your homemade version, you can fill them with any of your favorite toppings! The limit is your imagination.
- This simple Pogaca recipe explains 2 popular ways of shaping these savory cheesy buns.
- It is a crowd-pleaser, this pogaca recipe will make 20 to 22 medium-sized buns.
- Just like my Orange Cranberry Muffins, Raspberry Muffins with Yogurt, Turkish Boyoz Pastry, and Pacanga Boregi recipes, they are perfect for breakfast on the go or a healthy snack.
- Your kids will love these pogaca buns, they are perfect for their lunch boxes.
Free Turkish Dinner Ideas Guide
Need ideas for what to serve with Turkish meals? Get my free guide with 7 easy Turkish dinner ideas, including mains, sides, serving tips, and make-ahead notes.
What is Mahleb?
Just like Paskalya Çöreği (Tsoureki) - Easter Bread, mahleb is the secret ingredient of the pogaca recipe which gives it its unique aromatic fragrance.
It is an aromatic spice made from the stones of the St Lucie Cherries and it has been widely used in Middle Eastern and Mediterranean cuisine for centuries in baking.
Mahleb has a sweet and fruity smell and when you're baking with Mahleb, the entire house smells like heaven (or more like a bakery, which is the same to me).
I strongly suggest you use mahleb in your pastries if you can get hold of them. However, your Pogaca will still be delicious without it!
Ingredients You'll Need
Please scroll down to the recipe card below for the full ingredients list with measurements, complete recipe method, recipe notes, and nutritional information.

- Plain flour - It is also known as all-purpose flour. It is perfect for making cakes, cookies, pastries, and thickening sauces.
- Milk - I use semi-skimmed milk in this recipe but full-fat milk would work as well. It gives the Pogaca buns a soft texture. You can replace the milk with mineral water to make these pastries dairy-free!
- Vegetable oil - Use fresh vegetable oil that doesn’t have any off-flavors. Substitute it with melted butter, sunflower oil, or rapeseed oil.
- Egg - The egg white adds flavor to the cheese filling while the yolk is used for egg-washing the buns.
- Yeast - I use fast-action dry yeast for this recipe. The recipe also works with standard active/dry yeast or fresh yeast. Although you don't usually need to dissolve the fast-action yeast in warm water, the pogaca dough becomes fluffier if dissolved in warm water first.
- Feta cheese - I use creamy feta cheese for this recipe. You can substitute it with kashar cheese, mozzarella, halloumi, or cheddar as well as use a mixture of a few types of cheeses.
- Parsley - It is one of my favorite herbs and I use it with almost everything. You can use dill, mint, chives, basil, or oregano.
Step-by-Step Instructions
Making pogaca is very easy and straightforward and there are a few easy steps that you need to follow to achieve the best results:
Prepare the Filling
Crumble the cheese into small pieces. Add chopped parsley and the egg white. Mix all until combined.

Make The Pogaca Dough
Mix sugar, warm milk, warm water, vegetable oil, and yeast in a large bowl and then combine them.

Add the flour, mahleb (optional), and salt and combine to form a nice, soft dough. Adjust the amount of flour if needed. Knead until smooth and it doesn't stick to your hands anymore.

Shape the Buns
When the dough is ready, shape it straight away without waiting for the proofing. To shape the buns, divide the dough into egg-sized balls - you should have around 22 balls.
Take one ball and then flatten it on a lightly oiled work surface into a circle with your fingertips.

If you want to make round-shaped buns, put a spoonful of cheese mixture in the middle of the pastry. Fold the dough over the mixture to meet in the center and gently pinch the edges with your fingertips to seal.

Repeat the same for the rest of the balls and place them on a baking tray a few centimeters apart from each other. Make sure there is enough space between the buns for proofing.

If you want to make half-moon-shaped buns, put a spoonful of cheese mixture on one side of the pastry.

Fold the other side on top and then gently press the edges to make sure they stick to each other. Repeat the same for the rest of the balls.

Place the buns on a baking tray a few centimeters apart from each other so that there is enough space for proofing.

Proof the Buns
Egg wash the buns with some egg yolk using a brush.

Sprinkle with sesame seeds or nigella seeds and leave them to prove.

The proofing time varies depending on the temperature of the room so it always takes longer in the winter. You can use your oven to proof the buns if you want to shorten the process.
To use your oven for proofing, heat the oven just enough to have a warm feeling and then turn it off. Put the pastries in and then turn the oven lights on.

If you want to proof the buns at room temperature, cover the tray with a damp kitchen cloth and then leave them in a warm place until they double in size.

Bake the Buns
When the buns double in size, turn the oven on to 360° F (180° C) fan oven. Bake them for 25 to 30 minutes or until golden brown.


Top Tips From the Chef
- Make sure you lightly warm the milk and water up before adding the sugar and the yeast.
- The amount of flour in this recipe depends on the type of ingredients or the humidity of the weather. You should always add the flour gradually until you have the right consistency. We are after an “ear lobe” texture for nice and soft pastries.
- The proofing time varies depending on the temperature of the room so it always takes longer in the winter. You can use your oven to proof the buns if you want to shorten the process. To use your oven for proofing, heat the oven just enough to have a warm feeling and then turn it off. Put the pastries in and then turn the oven lights on.
Serving Suggestions
Just like Açma - Turkish Soft Bread Rings, these pastries are usually served as a breakfast item with a cup of Turkish tea.
You can serve them as a part of Turkish Breakfast along with some cheese, olives, Kuymak (Mihlama), Cilbir - Turkish Poached Eggs, Menemen - Turkish Scrambled Eggs, Kaygana (Turkish Omelette), and/or Shakshuka.
Same as Cranberry Orange Muffins, Eggless Chocolate Chip Cookies, and Chocolate Pastry Rolls, they are perfect as a snack on the go, for lunch boxes and picnics.
Free Turkish Dinner Ideas Guide
Need ideas for what to serve with Turkish meals? Get my free guide with 7 easy Turkish dinner ideas, including mains, sides, serving tips, and make-ahead notes.
Recipe FAQs
Pogaca can be found in almost most of the Balkan countries such as Croatia, Serbia, and Macedonia as well as in Turkey.
Although they all claim these pastries as their own, Turkey has the most different varieties.
You can store these pastries in an airtight container for up to 3 days at room temperature.
If you want to keep them longer, place them in freezing bags and keep them in the freezer for up to 3 months.
Pogaca is not considered difficult to make, but it does require some preparation and attention to detail. The dough needs to be kneaded properly before shaping, proofing, and baking. However, with a little bit of practice and following this simple recipe, anyone can make delicious Pogaca at home.
Related Recipes
For other delicious Turkish savory pastries why not try:


Did you make this recipe? Please let me know how it turned out! Leave a comment below and tag @cookingorgeous on Instagram and hashtag it #cookingorgeous.
I hope you enjoy the process of making these delicious Turkish savory pastries called "Pogaca" as much as you enjoy eating them! 🙂
Bon appétit! / Afiyet olsun!
Want to Save This Recipe?
Enter your email & I'll send it to your inbox. Plus, get great new recipes from me every week!
By submitting this form, you consent to receive emails from Cooking Gorgeous

Pogaca (Turkish Cheese Buns)
Equipment
- 1 kitchen scale
- 1 measuring spoons
- 1 large baking sheet
- 1 Pastry brush
- 1 grater
Ingredients
For the Feta Filling
- 1 cup crumbled feta (200 grams)
- 3 tablespoon parsley (chopped)
- 1 egg white (egg yolk will be used for egg wash)
For the Dough
- 6 ¾ cups plain (all-purpose) flour (850 grams)
- 1 pack active dry yeast (2 ¼ teaspoons)
- 1 cup water (warm) (230 ml)
- 1 cup milk (warm) (230 ml)
- 1 cup vegetable oil (230 ml)
- 2 teaspoon salt (16 grams)
- 3 teaspoon sugar (20 grams)
- 1 tablespoon mahleb (optional)
For the Top
- 1 egg yolk
- 2 tablespoon Sesame seeds or Nigella seeds
Instructions
Preparing the Feta Filling
- Crumble the cheese into small pieces.
- Add chopped parsley and the egg white.
- Mix all until combined.
Making the Dough
- Mix sugar, warm milk, warm water, vegetable oil, and yeast in a large bowl and combine them.
- Add the flour, mahleb (optional), and salt and combine to form a nice, soft dough. Adjust the amount of flour if needed.
- Knead until it smooth until it doesn't stick to your hands anymore.
- Divide the dough into egg-sized balls (you should have around 22 balls).
- Flatten the ball on the lightly oiled work surface into a circle with your hands.
- If you want to make round shape buns, put a spoonful of cheese mixture in the middle of the pastry and fold the dough over the mixture to meet in the center, and gently pinch the edges with your fingertips to seal and place the seam side down on a baking sheet lined tray.
- Shape the rest of the dough balls and place them on a baking tray a few centimeters apart from each other to make sure there is enough space for proofing.
- If you want to make half-moon-shaped buns, put a spoonful of cheese mixture on one side of the pastry and fold the other side on top and gently press the edges to make sure they stick to each other.
- Shape the rest of the dough balls and place them on a baking tray a few centimeters apart from each other to make sure there is enough space for proofing.
- Brush with egg wash and sprinkle sesame seeds or nigella seeds on top.
- Let them rise in a warm place until they double in size (it takes 45 minutes to an hour depending on the room temperature).
- Preheat the oven to 360° F (180° C) fan oven.
- Bake them until golden brown (usually takes around 25-30 mins depending on the performance of your oven).
Video
Notes
- Make sure you lightly warm the milk and water up before adding the sugar and the yeast.
- The amount of flour in this recipe depends on the type of ingredients or the humidity of the weather. You should always add the flour gradually until you have the right consistency. We are after an “ear lobe” texture for nice and soft pastries.
- The proofing time varies depending on the temperature of the room so it always takes longer in the winter. You can use your oven to proof the buns if you want to shorten the process. To use your oven for proofing, heat the oven just enough to have a warm feeling and then turn it off. Put the pastries in and then turn the oven lights on.
Nutrition
This post uses affiliate links. This means that if you click on them and then buy something, we get a small amount of commission to keep the site running, but it doesn’t cost you anything more.

Teresa says
im excited to try this recipe of yours too! but im wondering if there a mistake in your recipe?
I see 230ML of warm milk and another 230ml warm milk .. is that repeated twice by accident?
Also, 230ml of vegetable oil seems a lot for 850g of flour. Im asking because the acma recipe you only put 130ml of oil with 800g of flour.
And finally, just out of curiosity is there a reason why mahleb is used a lot more in this bread recipe than acma?
thank you:)
Ayla Clulee says
Hi Teresa,
I just checked, and the recipe calls for 230ml of warm milk and 230ml of warm water, not milk twice. The amount of oil might seem a bit much, but this is the recipe I’ve been using for decades, and it works perfectly. The flour measurement is just right, though you might need to adjust it slightly depending on the humidity in your kitchen. As for the mahleb, you can adjust the amount to your preference. It doesn’t affect the taste much, but it enhances the aroma and gives the bread a distinct fragrance. Hope this helps! Let me know if you have any other questions. 😊
Best wishes
Ayla x
Teresa says
Thanks so much Ayla for clarifying everything!
I misread the recipe and thought i saw milk twice 🙈
I will try this recipe soon!
Ayla Clulee says
My pleasure, please let me know how it turns out for you!
Connie says
What type of flour do you use, bread flour of all purpose flour?
Thanks
Ayla Clulee says
It is all-purpose flour.
John S. says
These were truly addictive! The dough is very good to work with and the mahleb a nice touch.
Ayla Clulee says
Dear John
I totally agree with them being addictive. I am so glad you enjoy them as mush as we do!
Gigi Marie Ekinci says
Love this recipe!
Ayla Clulee says
Dear Gigi Marie, I am so happy to hear that!
This recipe has been a family favourite for decades and I am so pleased to hear that you love it too.
Best wished
Ayla x
Sammy says
My daughter and her friends made this recipe yesterday for Iftar and we loved it! Super delicious and fresh and smell amazing while baking. We used Mediterranean Feta cheese for the filling and topped the buns with black seed because that’s what we had on hand.
Ayla Clulee says
So glad to hear that Sammy!
Ramadan Mubarak to you and your family.
Ayla
Rita says
Scrumptious! So easy to make, impossible to fail.
Kim says
My family requests these every week, they are that good. I plan on making these cheesy pastries forever! Thanks so much for the awesome recipe.
Renan says
These are incredibly soft and fluffy , thanks for the recipe.
Sophie says
I’ve made these last weekend. They taste great!
Rachael says
This recipe is perfection. Easy to make with a fabulously tasty result. Bravo!
Ayla Clulee says
Thank you, Rachael!
Lara says
I’ve made this a few times, always good results.
Rose says
I just made these and they are absolutely wonderful, They’re flavourful, soft and cheesy. I see a lot of them in my future. Thank-you!!!
Ayla Clulee says
I am so glad they turned out great for you, Rose.
Best wishes
Ayla x
Rosemary says
This is an excellent recipe, better than store bought. They disappeared so quickly I had to make more and I doubled the recipe this time. Thank you so much!
Donna says
I just made these. They are wonderful and not too difficult to make. Thanks for sharing the recipe.
Becky says
These pastries turn out absolutely wonderful. The recipe and instructions are so precise and easy to follow.
Ayla says
Delicious. I could eat that daily. My 7 and 8-year-old kiddos loved it as well.