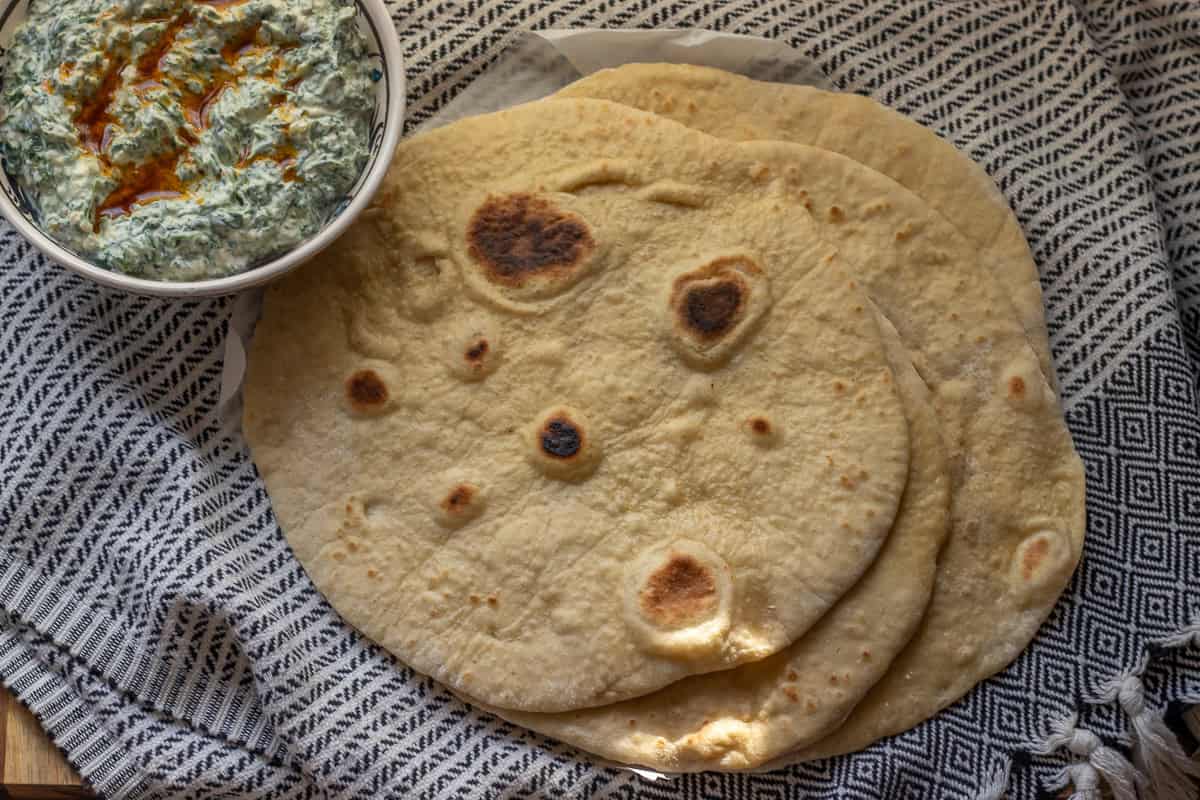
My Pita Bread Recipe makes soft Greek-style flatbreads with simple pantry ingredients: all-purpose flour, yeast, water, sugar, and salt. They are pocketless, flexible, and perfect for wrapping around kebabs, gyros, or grilled chicken, or for scooping up dips like Hummus, Cacik - Turkish Yogurt Dip, Spinach Dip -Borani, and Ajvar - Red Pepper and Eggplant Dip.
Jump to:
This is the type of pita bread I like to make when I need something soft enough to fold without cracking. You can cook it in a hot skillet for a lightly charred finish or bake it in the oven if you prefer a puffier pita. Both methods are included below, so you can use whichever works best for your kitchen.
The dough is easy to prepare ahead, and the cooked pita breads freeze well, too. It is a great recipe to keep on hand for quick lunches, meze nights, barbecues, and any meal that needs warm bread on the side.

What is Greek Pita Bread?
Greek pita bread is usually a soft, round, pocketless flatbread served with souvlaki, gyros, kebabs, dips, and salads. It is different from the hollow pita bread often used for stuffing because it is usually thicker, softer, and made for wrapping rather than filling.
This recipe makes a simple homemade pita bread with all-purpose flour, yeast, water, sugar, and salt. There is no yogurt, milk, or egg in the dough, so it is naturally dairy-free and vegan-friendly.
You can cook the pita bread on the stovetop in a skillet or bake it in a hot oven. The skillet method gives a softer, more flexible pita with toasted spots. The oven method can make the pita puff more, especially if the tray or pizza stone is properly heated first.
Check out my Laffa - Iraqi Flatbread recipe if you want a soft flatbread with a pocket.

Why This Recipe Works?
- This pita bread recipe uses simple pantry ingredients, so you do not need yogurt, milk, eggs, or any special flour.
- The dough is soft and slightly sticky, which helps the pita stay flexible after cooking.
- You can cook the pita bread in a skillet or bake it in the oven, depending on the texture you prefer.
- It works well as a pocketless pita bread for gyros, kebabs, wraps, dips, and meze dishes.
- The dough can be made ahead and kept in the fridge for up to 3 days.
- Cooked pita breads freeze well, so you can make a batch and reheat them when needed.
Ingredients You'll Need
Please scroll down to the recipe card below for the full ingredients list with measurements, complete recipe method, recipe notes, and nutritional information.
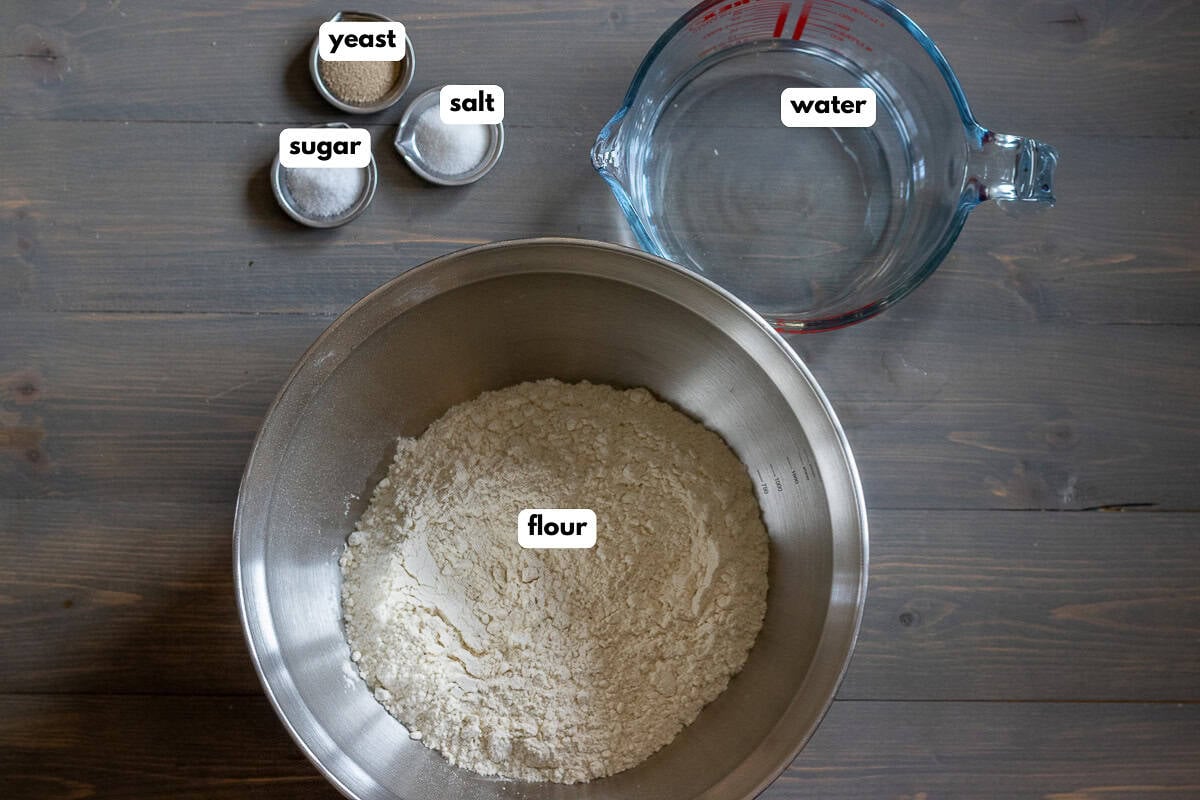
- Plain white flour or all-purpose flour - Depending on the flour brand and the humidity in your kitchen, you may need slightly less or a small spoonful more.
- Yeast - Use 1 teaspoon fast-action dry yeast. You can use active dry yeast, too, but let it sit in the warm water and sugar until foamy before adding the flour.
- Sugar - I use caster sugar or granulated sugar. It feeds the yeast and helps the dough rise.
- Salt - It gives the pita bread flavour and helps strengthen the dough.
How to Make Pita Bread
Prepare the Dough
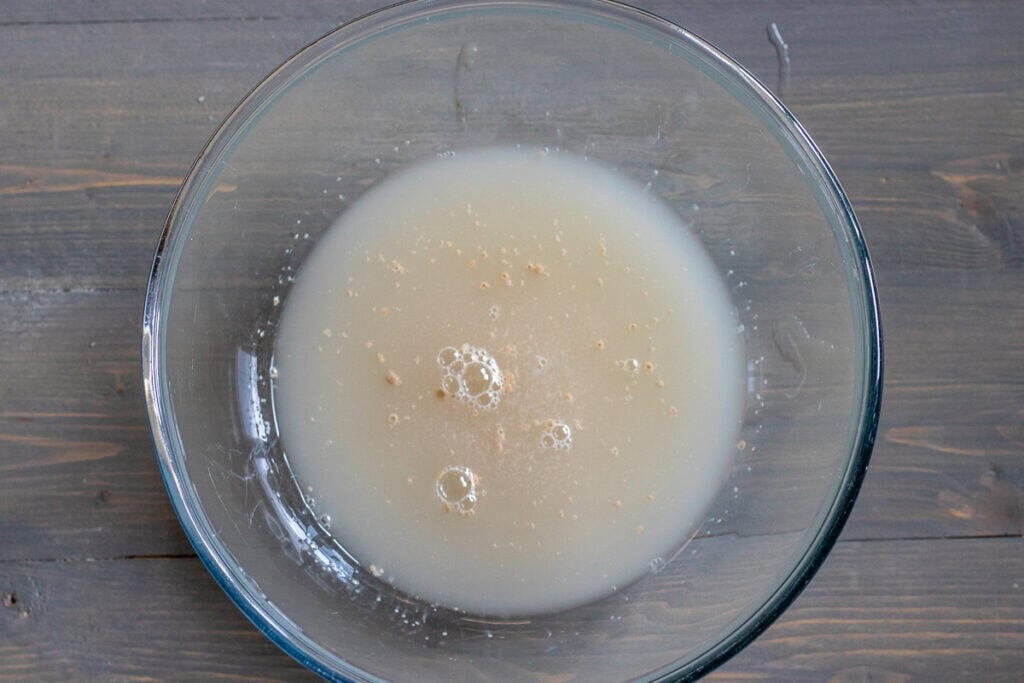
Add the lukewarm water, sugar, and yeast to a large mixing bowl. Stir and leave it for about 10 minutes, or until the top looks foamy. This shows that the yeast is active.

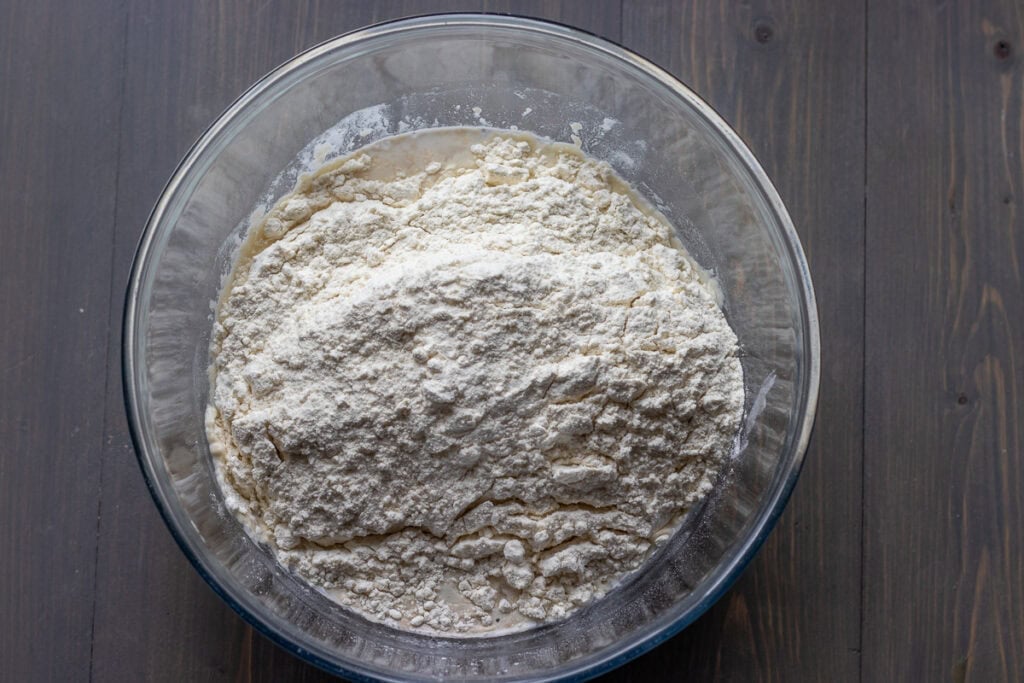
Add the salt and most of the flour. Mix with a spoon or your hand until a soft dough forms. Add the rest of the flour gradually, only as needed. The dough should be soft, smooth, and just a little sticky. Avoid adding too much flour, or the pita bread can turn dry and stiff.
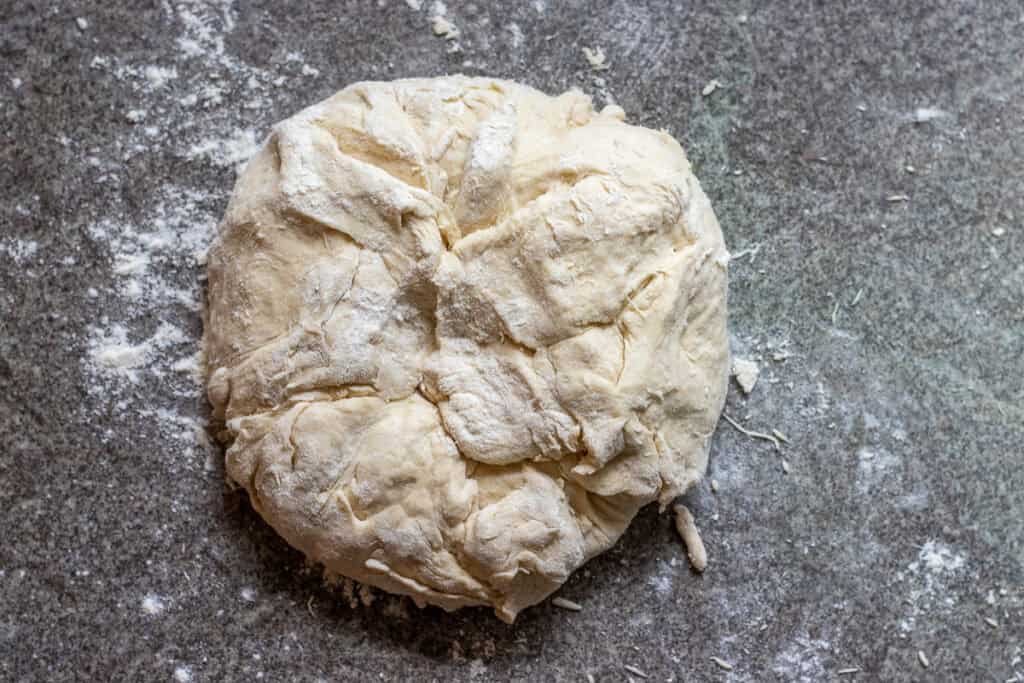
Turn the dough onto a lightly floured surface and knead it for about 6 to 8 minutes, or until it feels smooth and elastic. It should still stick slightly to your hands, but it should not be wet or messy.
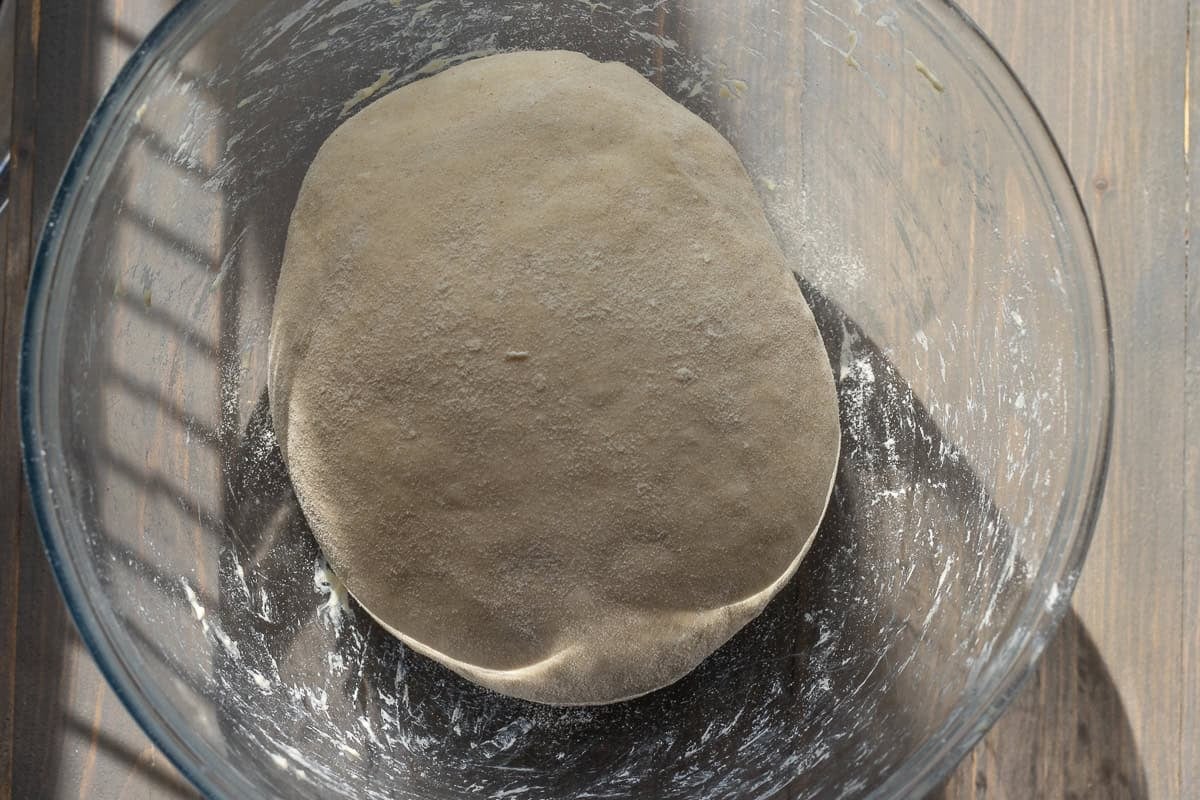
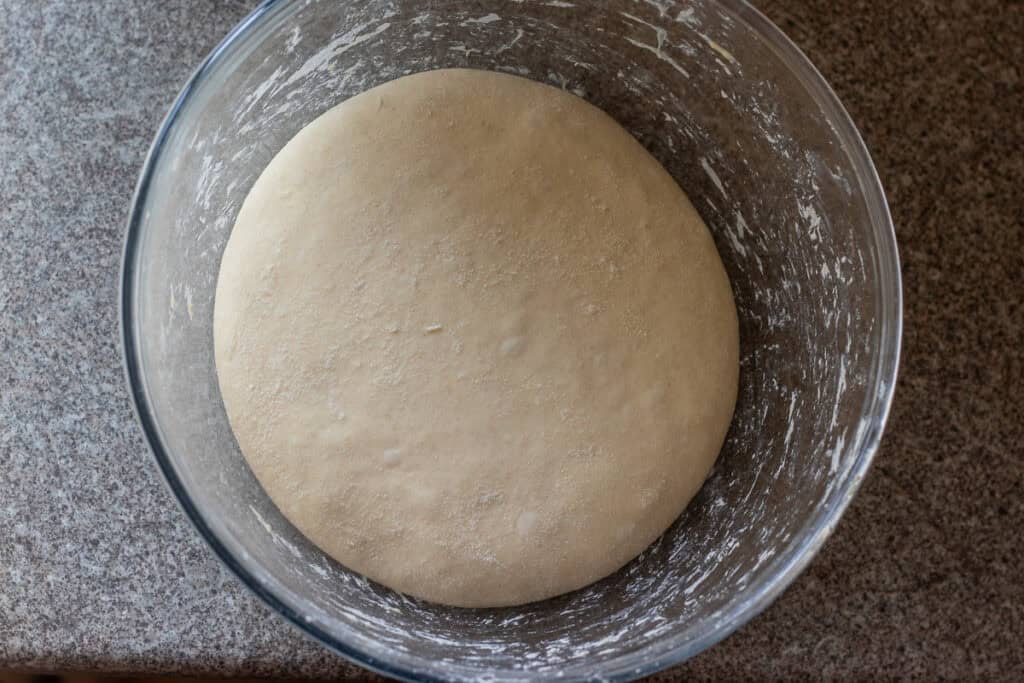
Place the dough back in the bowl, cover it with a clean kitchen towel, and leave it in a warm place for about 1 hour, or until doubled in size. In a colder kitchen, it may take closer to 2 hours.
Shape the Pita Bread
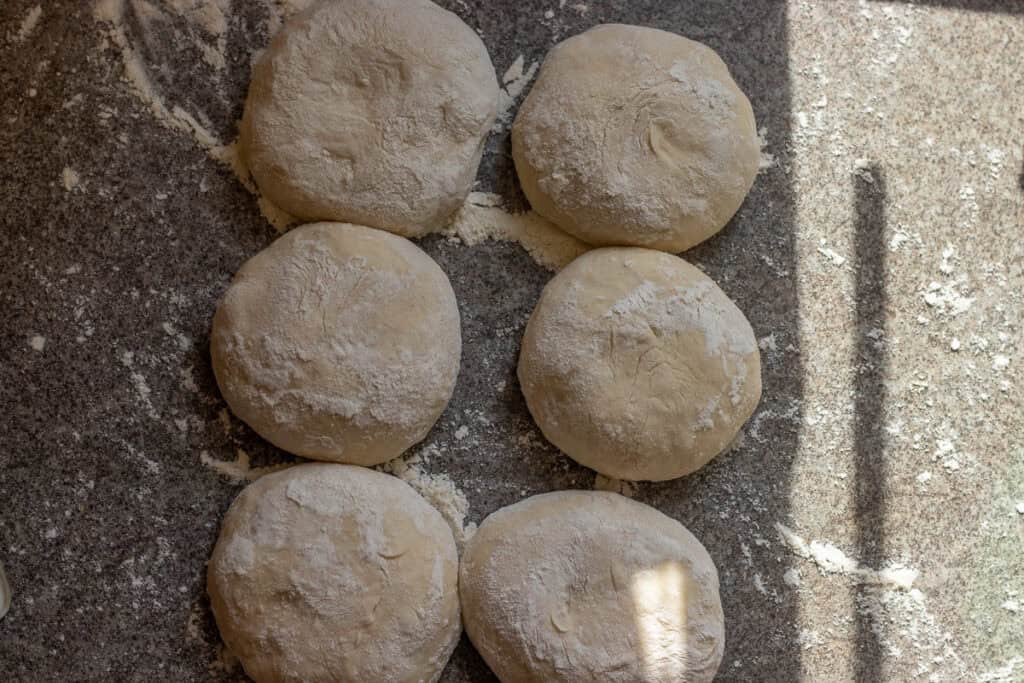
Once the dough has doubled, gently press it down to release the air. Transfer it to a lightly floured surface and divide it into 6 equal pieces. For smaller pita breads, divide it into 8 pieces. Shape each piece into a ball. Place the dough balls on a lightly floured surface, sprinkle a little flour on top, cover with a clean kitchen towel, and rest for 15 minutes. This resting time makes the dough easier to roll.
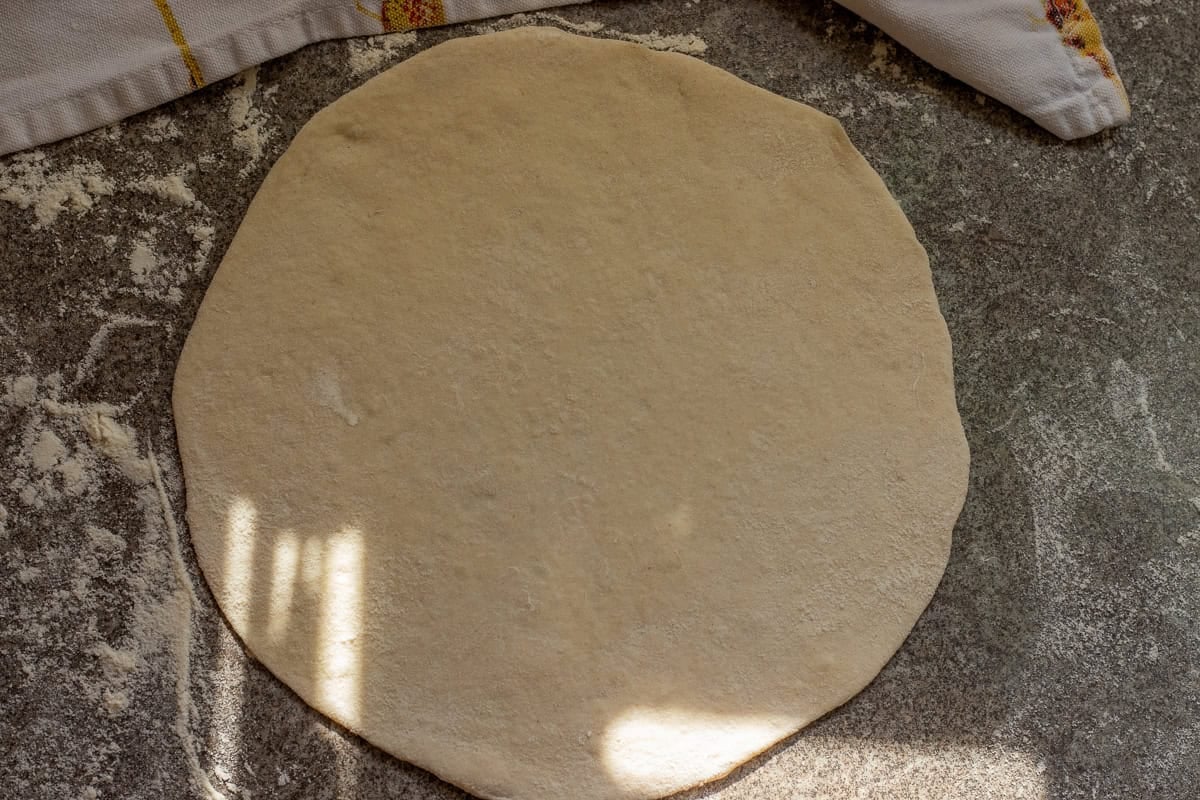
Roll each dough ball into a round about 8 inches (20 to 21 cm) wide. Try to roll it evenly so it cooks at the same speed across the surface. If the dough keeps shrinking back, leave it for 5 minutes, then roll it again.
Cook Pita Bread in a Skillet
Heat a large skillet, cast iron pan, or heavy-based frying pan over medium-high heat. The pan is ready when a few drops of water sizzle as soon as they touch the surface.
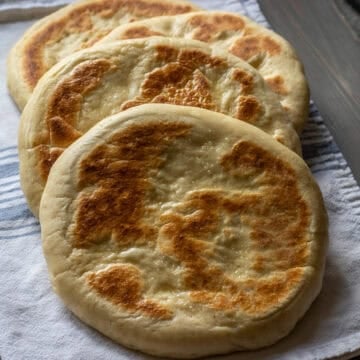
Place one rolled pita in the hot pan. Cook for about 30 seconds, or until small bubbles appear on the surface. Flip it with tongs and cook for 1 to 2 minutes, until brown spots appear underneath.
Flip it again and cook for another 1 to 2 minutes, until the pita is cooked through and has a few toasted spots. Transfer it to a plate and cover with a clean kitchen towel while you cook the rest.
Brush with a little softened butter or olive oil after cooking if you like a softer finish. This is optional.

Bake Pita Bread in the Oven
Preheat the oven to 446°F (230°C). Place a baking tray or pizza stone inside the oven while it heats. A hot surface helps the pita cook quickly and puff better.
Roll out the dough balls and place them on baking parchment. Rest them for 10 to 15 minutes while the oven finishes heating.
Carefully transfer 2 or 3 pitas at a time onto the hot baking tray or pizza stone. Bake for 2 to 3 minutes, or until lightly golden and puffed in places.
Remove from the oven and cover with a clean kitchen towel straight away. Repeat with the remaining dough.
How to Keep Homemade Pita Bread Soft
The most important step is to cover the cooked pita breads as soon as they come off the skillet or out of the oven. The steam helps keep them soft and flexible.
Do not overcook them. Pita bread only needs a few minutes. If you leave it too long in the pan or oven, it will become crisp around the edges and may crack when folded.
The dough also matters. A soft, slightly sticky dough gives you a softer pita. A dry dough with too much flour makes a tougher bread.
Why Did My Pita Bread Not Puff Up?
Pita bread usually puffs when the heat is high enough and the dough is rolled evenly. The steam inside the dough pushes the bread apart as it cooks.
If the pita does not puff, the pan or oven may not be hot enough. It can also happen if the dough is rolled too thick, too thin, or unevenly. Small tears in the dough can also let steam escape.
For Greek-style pocketless pita bread, a full puff is not essential. The pita can still be soft, flexible, and useful for wraps, even if it does not form a pocket.
Recipe Tips From the Chef
- Add the flour gradually. You may not need every last spoonful, especially in a warm or humid kitchen.
- Keep the dough soft. A slightly sticky dough is better than a dry dough for soft pita bread.
- Rest the dough balls before rolling. This makes the dough easier to shape and stops it from shrinking back.
- Heat the skillet properly before cooking. A pan that is too cool can make the pita dry before it cooks through.
- Cover cooked pitas with a towel straight away. This keeps them soft and warm. Do not stack uncovered pita breads on the counter. They dry out quickly.
- For softer pita, cook on the stovetop. For puffier pita, use a very hot oven and a preheated tray or pizza stone.
- Use a cast-iron skillet or heavy-based pan if you have one. It holds heat better than a thin pan.
Make Ahead
You can make the pita dough up to 3 days ahead. Prepare the dough, let it rise, then cover and keep it in the fridge.
When you are ready to cook, take the dough out of the fridge and let it sit at room temperature until it feels soft enough to shape. This can take 30 to 60 minutes, depending on your kitchen.
You can also roll and cook only the amount you need, then keep the rest of the dough covered in the fridge.
Storage
Homemade pita bread is best served warm, but leftovers keep well. Once cooled, place them in an airtight bag or container and keep at room temperature for up to 2 days.
For longer storage, keep them in the fridge for up to 4 days. Warm them before serving because chilled bread can feel firm.
Pita bread freezes very well. Let the breads cool completely, then place a piece of baking parchment between each one. Wrap well or place them in a freezer bag.
Freeze for up to 3 months. Reheat from frozen in a hot oven, toaster, air fryer, or dry skillet until soft and warm.
How to Reheat Pita Bread
To reheat in a skillet, warm each pita for 20 to 30 seconds on each side over medium heat.
To reheat in the oven, wrap the pita breads in foil and warm at 350°F (180°C) for about 8 to 10 minutes.
To reheat in the air fryer, warm at 320°F (160°C) for 2 to 3 minutes. Keep an eye on them because they can dry out quickly.
Serving Suggestions
Serve this soft pita bread with Turkish Chicken Shish Kebab, Lebanese Chicken Shawarma, or Joojeh Kabab (Persian Chicken Kebab). It is also great with dips such as Baked Feta Cheese, Haydari - Turkish Yogurt Dip, Ezme Salad (Acili Ezme), or Tirokafteri (Spicy Whipped Feta Dip.
You can use leftover pita bread as a quick pizza base, cut it into triangles for pita chips, or serve it with soups such as Mercimek Corbasi (Turkish Lentil Soup), Moroccan Harira Lamb and Chickpeas Soup, Autumn Squash Soup, Mediterranean Lentil Soup.
Recipe FAQs
Pita bread can become tough if too much flour is added, the dough is not rested enough, or the bread is overcooked. Keep the dough soft and cover the cooked pitas with a towel straight away.
Yes, the pita bread dough is vegan and dairy-free. Brushing the cooked pita with butter is optional. Use olive oil instead, or leave it plain.
Yes, this is a Greek-style pocketless pita bread. Some pieces may puff slightly as they cook, especially in the oven, but the bread is mainly soft and flexible for wraps.
Related Recipes
For more delicious bread recipes why not try:


Did you make this recipe? Please let me know how it turned out! Leave a comment below and tag @cookingorgeous on Instagram and hashtag it #cookingorgeous.
I hope you enjoy the process of making this delicious pocket-less Pita Bread Recipe as much as you enjoy eating it! 🙂
Want to Save This Recipe?
Enter your email & I'll send it to your inbox. Plus, get great new recipes from me every week!
By submitting this form, you consent to receive emails from Cooking Gorgeous

Pita Bread Recipe
Ingredients
- 1 cup water (250 ml)
- ½ teaspoon sugar (3 grams)
- 1 teaspoon fast action dry yeast
- 1 teaspoon salt (6 grams)
- 3 cups plain white flour / all purpose flour (370 grams)
Instructions
Making the Dough
- Add the lukewarm water, sugar, and yeast to a large bowl. Stir and leave for 10 minutes, or until foamy.
- Add the salt and most of the flour. Mix until a soft, slightly sticky dough forms. Add the remaining flour gradually, only as needed.
- Turn the dough onto a lightly floured surface and knead for 6 to 8 minutes, or until smooth and elastic.
- Place the dough back in the bowl, cover with a clean kitchen towel, and leave in a warm place for about 1 hour, or until doubled in size.
Shaping the Pita Bread
- Gently press down the risen dough and transfer it to a lightly floured surface.
- Divide the dough into 6 equal pieces and shape each piece into a ball.
- Place the dough balls on a lightly floured surface, sprinkle with a little flour, cover with a clean kitchen towel, and rest for 15 minutes.
- Roll each dough ball into a round about 8 inches (20 to 21 cm) wide. If the dough shrinks back, let it rest for 5 minutes, then roll again.
- Repeat with the rest of the dough and cover them with a clean kitchen towel to keep warm.
Cooking on the Stovetop
- Heat a large skillet or heavy-based pan over medium-high heat until a few drops of water sizzle on contact.
- Place one rolled pita in the hot pan and cook for about 30 seconds, or until small bubbles appear.
- Flip with tongs and cook for 1 to 2 minutes, until brown spots appear underneath.
- Flip again and cook for another 1 to 2 minutes, until cooked through.
- Transfer to a plate and cover with a clean kitchen towel. Repeat with the remaining dough.
Baking in the Oven
- Preheat the oven to 446°F (230°C). Place a baking tray or pizza stone in the oven while it heats.
- Place the rolled pita breads on baking parchment and rest for 10 to 15 minutes.
- Carefully transfer 2 or 3 pitas at a time onto the hot tray or pizza stone.
- Bake for 2 to 3 minutes, or until lightly golden and puffed in places.
- Remove from the oven and cover with a clean kitchen towel. Repeat with the rest.
Notes
- The dough should be soft and slightly sticky. Avoid adding too much flour.
- Rising time depends on the temperature of your kitchen. In winter, it may take longer.
- For softer pita bread, cook it in a skillet and keep it covered after cooking.
- For puffier pita bread, bake it on a preheated tray or pizza stone.
- You can prepare the dough up to 3 days ahead and keep it in the fridge after the first rise.
- Cooked pita breads can be frozen for up to 3 months.
- This pita bread recipe is dairy-free and vegan-friendly.

Olivia says
This recipe was perfect! SO good, my family couldn’t keep their hands off of it!
Ayla Clulee says
Thank you Olivia, I am so pleased to hear that!
PERRY GONEOS says
Thank you for the recipes
Perry
Ayla Clulee says
It is my pleasure, Perry! I am glad you like them.
Best wishes
Ayla x
Ayla says
I made these for friends and it was such a hit!
Mehmet says
I will definitely try
Ayla Clulee says
Thank you Mehmet, let me know how it turns out for you 🙂
Best wishes
Ayla