My Kadaif Recipe, also known as Turkish Tel Kadayif, is a syrup-soaked dessert made with fine kadaif pastry strands, melted butter, chopped walnuts or pistachios, and a simple sugar syrup. It bakes until golden and crisp on top, then soaks up the syrup slowly as it cools.

This is one of the easiest syrup-soaked Turkish desserts to make at home. You do not need to roll pastry, stack delicate phyllo sheets, or work with a long list of ingredients. The pastry already comes in thin strands, so the main work is separating it gently, mixing it well with butter, pressing it into the tray, and baking it until nicely golden.
Jump to:
- What Is Kadaif?
- Kadaif vs Kunefe
- Why This Recipe Works?
- Ingredients You'll Need
- Fresh vs Frozen Kadaif Pastry
- How to Make Kadaif
- Common Mistakes to Avoid
- Recipe Tips From the Chef
- How to Serve Kadaif
- Storage
- Can You Make Kadaif Ahead of Time?
- Can You Freeze Kadaif?
- Recipe Variations
- Recipe FAQs
- Related Recipes
- Kadaif Recipe (Turkish Tel Kadayif Dessert)
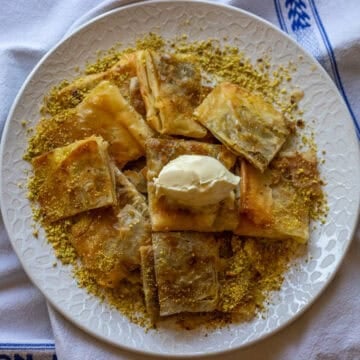
Kadaif, also called tel kadayif in Turkey, is often served during Ramadan, Eid, family gatherings, and special dinners. It is rich and sweet, so a small piece goes a long way. I like serving it with extra ground pistachio and a dollop of kaymak on top or a scoop of Turkish Ice Cream on the side.
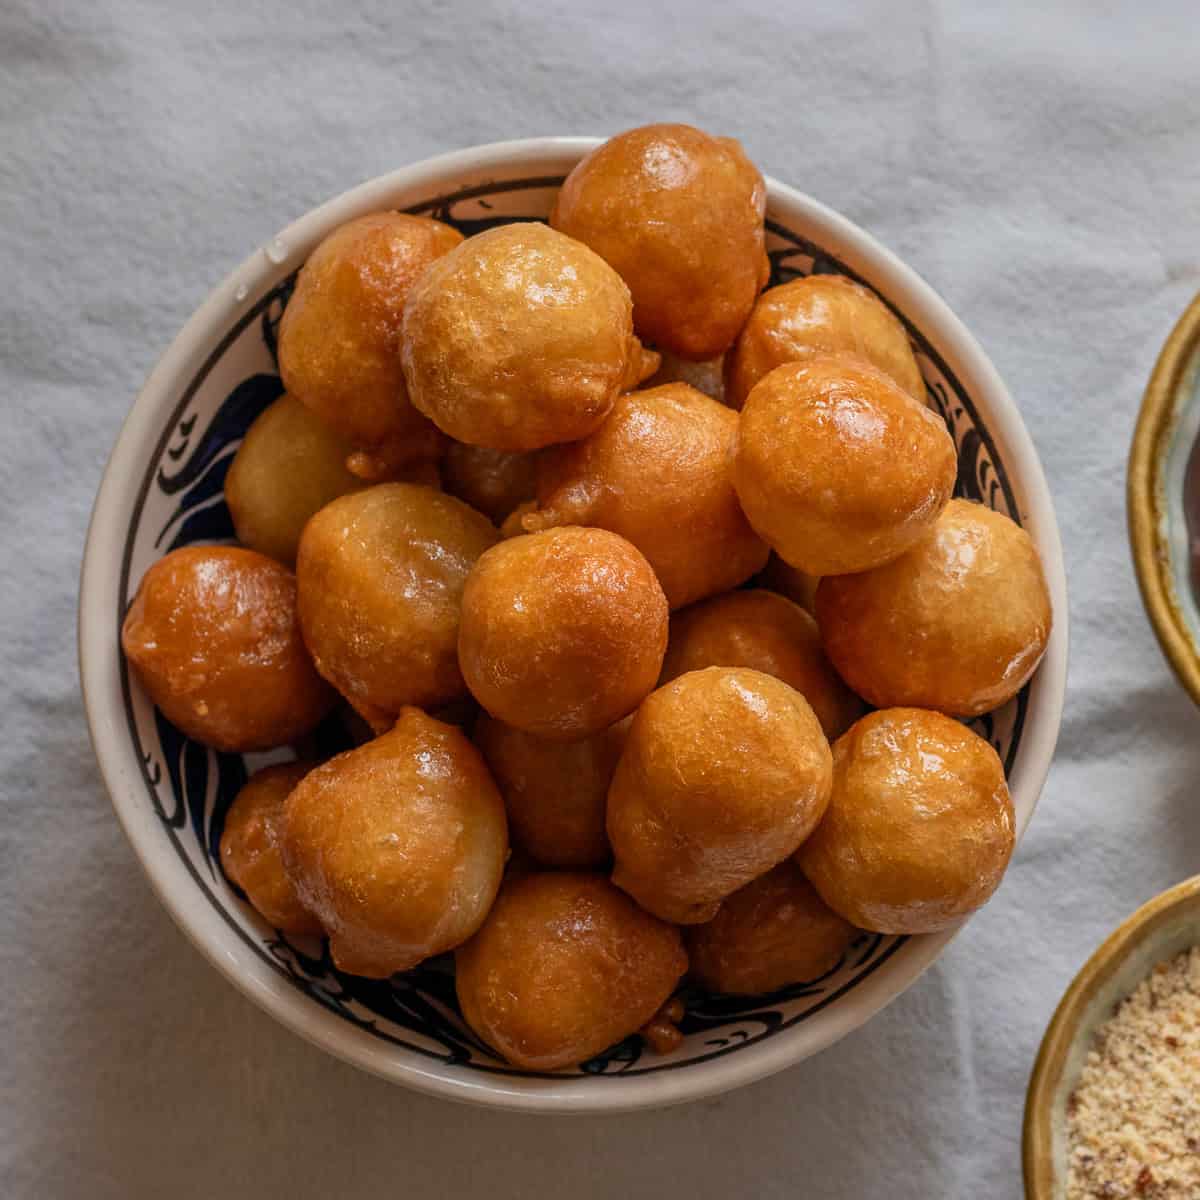
If you enjoy Turkish syrup desserts like Revani - Turkish Semolina Cake, Irmik Helvasi (Turkish Semolina Halva), Capirotada - Mexican Bread Pudding, Tulumba - Turkish Fried Dough Dessert, and Qatayef - Middle Eastern Stuffed Pancakes, this kadaif dessert is a lovely one to add to your baking list.
What Is Kadaif?
Kadaif is a traditional Turkish dessert made with very fine strands of pastry, butter, nuts, and syrup. In Turkey, it is often called tel kadayif, which refers to the thin, thread-like shape of the pastry.
Kadaif pastry is sometimes described as shredded filo, but that is not quite accurate. Filo pastry starts as a dough that is rolled into thin sheets. Kadaif pastry is different. It is made from a very thin, pourable batter that is drizzled in fine lines over a hot rotating surface. As it cooks, it forms long, delicate strands.
So, kadaif is not filo that has been shredded or pulled apart. It is its own type of pastry, made as fine strands from the start.
Kadaif vs Kunefe
Kadaif and kunefe both use kadayif pastry, but they are not the same dessert.
Kadaif is usually made with buttered pastry strands, chopped nuts, and syrup. It is baked in a tray, cut into portions, and often served at room temperature.
Kunefe, also spelled knafeh or kanafeh, has a cheese filling and is usually served hot, while the cheese is still soft and stretchy. It also uses syrup and pistachios, but the texture and serving style are different.
So, if you are looking for the Turkish dessert made with kadayif pastry, walnuts or pistachios, and no cheese, this is the recipe you need.
Why This Recipe Works?
- It is easier than Homemade Turkish Baklava - You still get crisp pastry, nuts, butter, and syrup, but you do not need to layer thin pastry sheets one by one.
- The ingredients are simple - Kadayif pastry, butter, nuts, sugar, water, and lemon juice are all you need.
- It is great for making ahead - Kadayif needs time to rest after the syrup goes on, so you can prepare it several hours before serving.
- It keeps well - The top softens after the first day, but the flavor stays lovely for several days.
- Slicing the hot kadayif before adding the syrup helps the syrup reach the middle and edges of every piece.
Ingredients You'll Need
Please scroll down to the recipe card below for the full ingredients list with measurements, complete recipe method, recipe notes, and nutritional information.

- Kadaif pastry - It is made from a thin batter that cooks into fine, thread-like strands on a hot surface. You can usually find fresh or frozen kadayif in Turkish, Middle Eastern, Mediterranean, and some international food shops.
- Butter - Use unsalted butter for the best flavor. Melt it fully before mixing it with the kadayif pastry. You can use ghee instead of butter if you prefer a richer flavor.
- Sugar - Granulated sugar works well for the syrup. Castor sugar is also fine, as it dissolves quickly.
- Walnuts or pistachios - Walnuts are common in homemade Turkish kadayif and give the dessert a lovely nutty filling. Chop them finely, but do not grind them into a powder or paste. Pistachios also work beautifully and give the dessert a richer flavor and color. You can use all walnuts, all pistachios, or a mix of both.
Fresh vs Frozen Kadaif Pastry
Fresh kadaif pastry is softer and usually easier to separate. If you can buy it fresh, it is a good option for this recipe.
Frozen kadaif pastry also works very well. Thaw it overnight in the refrigerator before using, then bring it out shortly before you start preparing the dessert. Do not try to pull the strands apart while they are still frozen, as they can break into tiny pieces.
Some packaged kadaif can be a little drier than fresh pastry. If the strands feel dry or brittle, take extra care when mixing them with the melted butter.
How to Make Kadaif
Prepare the Syrup
Preheat your oven to 350°F (180°C). Grease a 12" x 9" x 2.5" / 32 cm x 24 cm x 6 cm baking tray with butter and set it aside.
Start with the syrup, as it needs time to cool before the kadayif comes out of the oven. Place the sugar and water in a saucepan over medium heat. Stir until the sugar dissolves, then bring it to a boil. Lower the heat and let the syrup simmer gently for 15 to 20 minutes, until it thickens slightly.


Add a few drops of lemon juice and simmer for another 2 to 3 minutes. Remove the pan from the heat and let the syrup cool completely. It does not need to be fridge-cold, but it should not be hot when you pour it over the baked kadayif.
Build the Layers
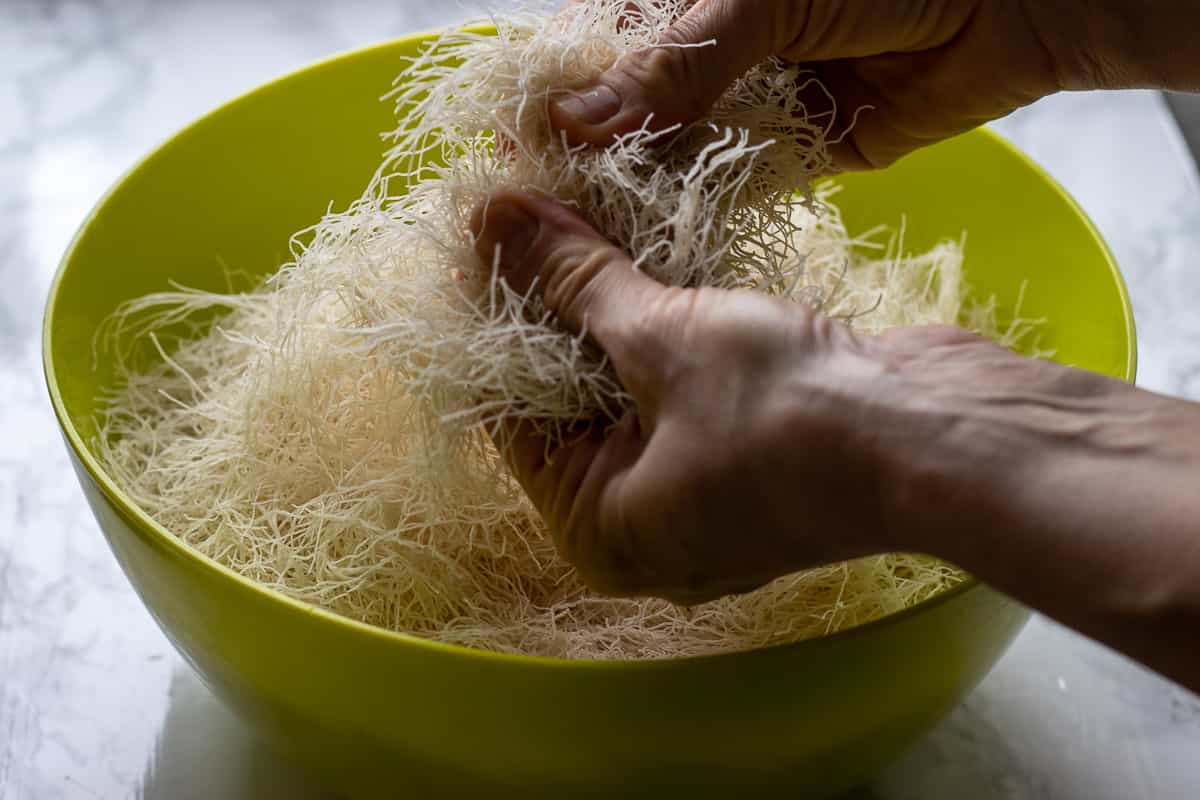
Place the kadayif pastry in a large bowl or on a clean tray. Gently separate the strands with your fingers and remove any thick clumps or knots.
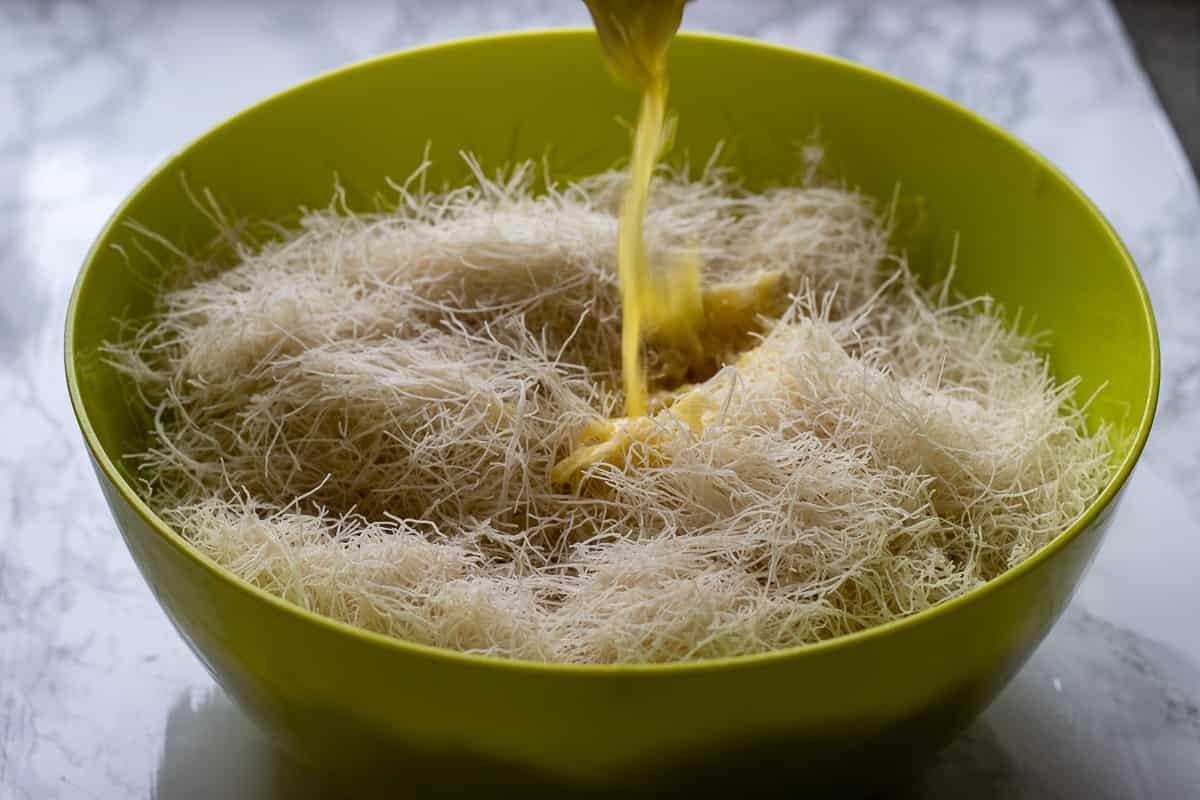
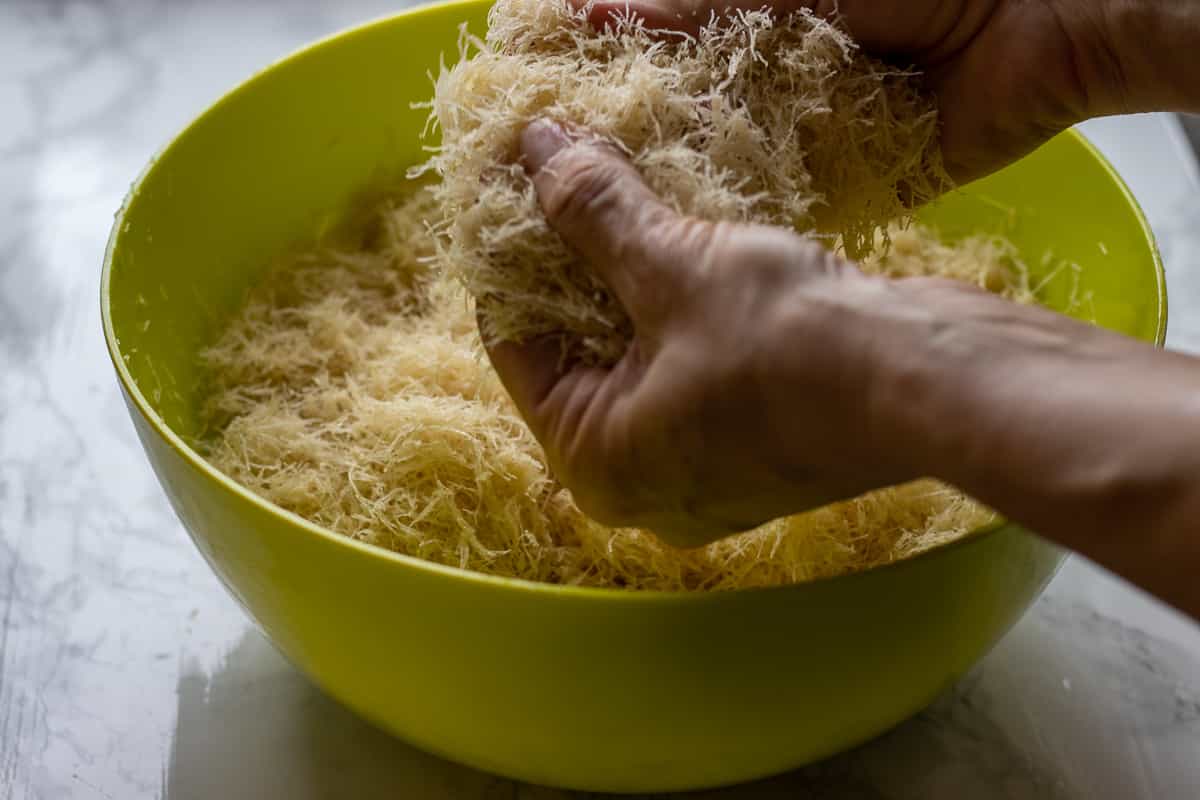
Melt the butter in a small saucepan or in the microwave. Pour the melted butter over the kadayif pastry and mix it well with your hands.
Keep lifting and turning the strands until the butter coats the pastry evenly. This step is important. Dry patches can bake unevenly and feel hard after baking, so make sure the butter reaches all parts of the pastry.
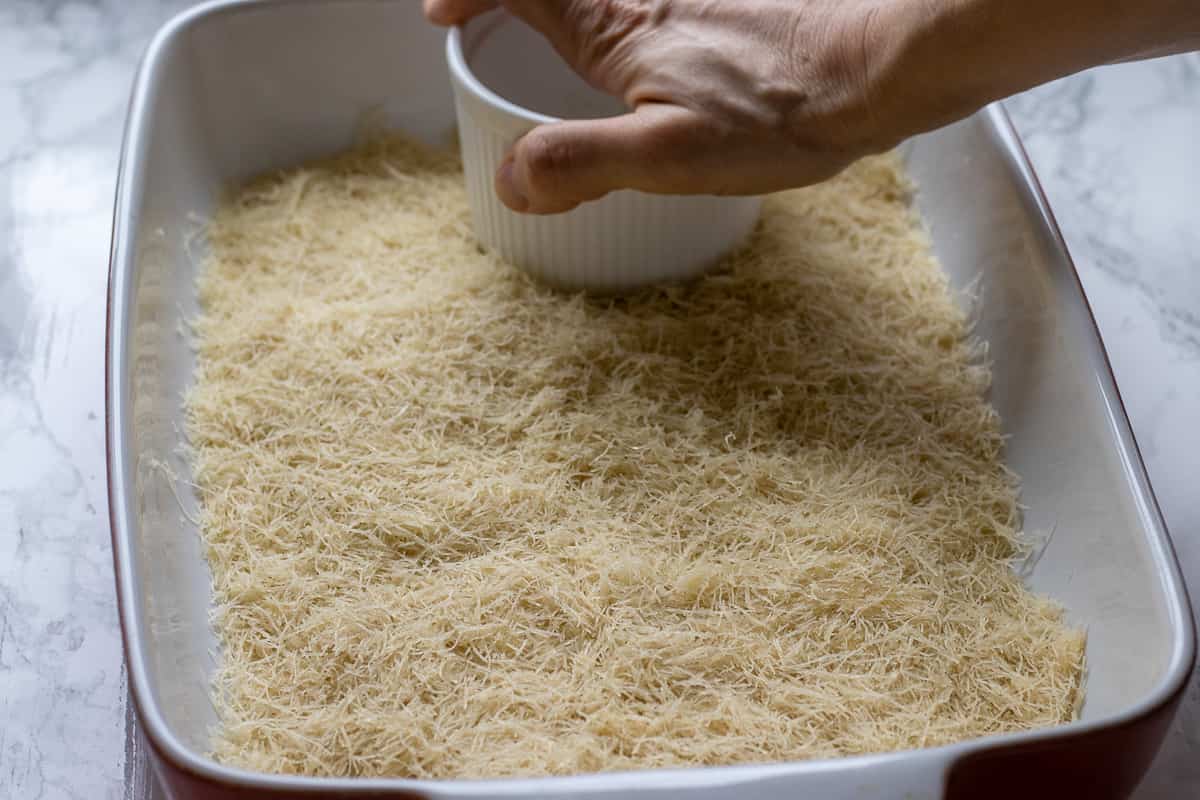
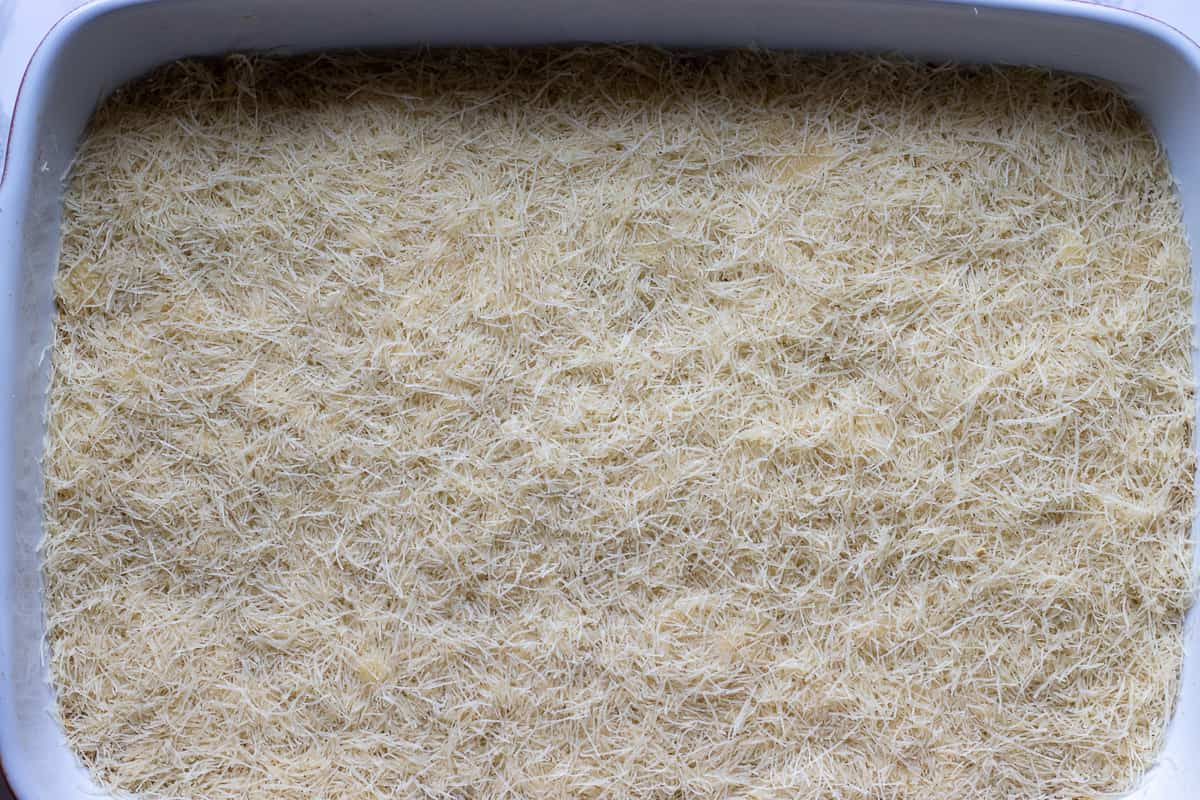
Place half of the buttered kadayif pastry into the greased baking tray. Spread it out evenly, then press it down firmly with your hands or the bottom of a bowl. The first layer should feel compact, not loose. This helps the kadayif hold together after baking and slicing.
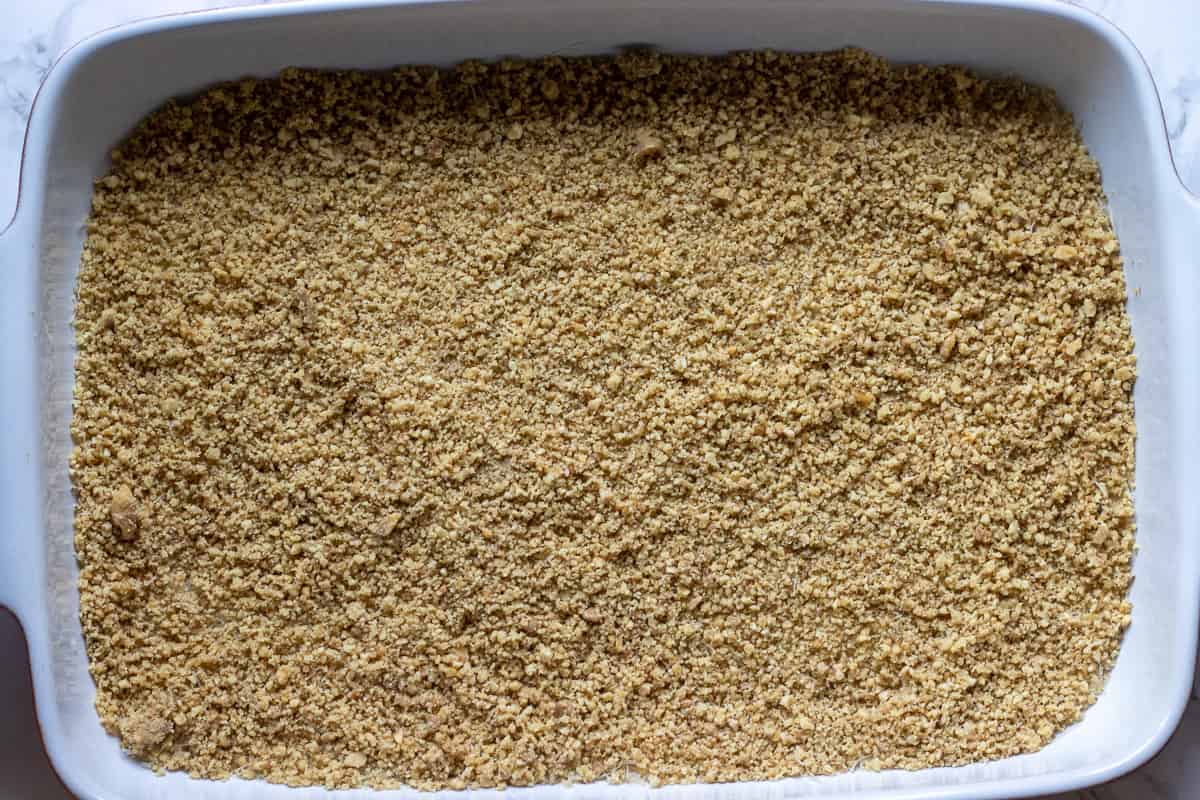
Scatter the chopped walnuts or pistachios evenly over the pastry base.
Top the walnut filling with the rest of the kadaif pastry, pressing down firmly to create a smooth surface. Add the remaining buttered kadayif pastry on top. Spread it out evenly, then press it down firmly again to create a level surface. Do not leave the top layer too airy. A firmly pressed kadayif bakes better, slices more neatly, and absorbs the syrup more evenly.
Bake the Kadayif
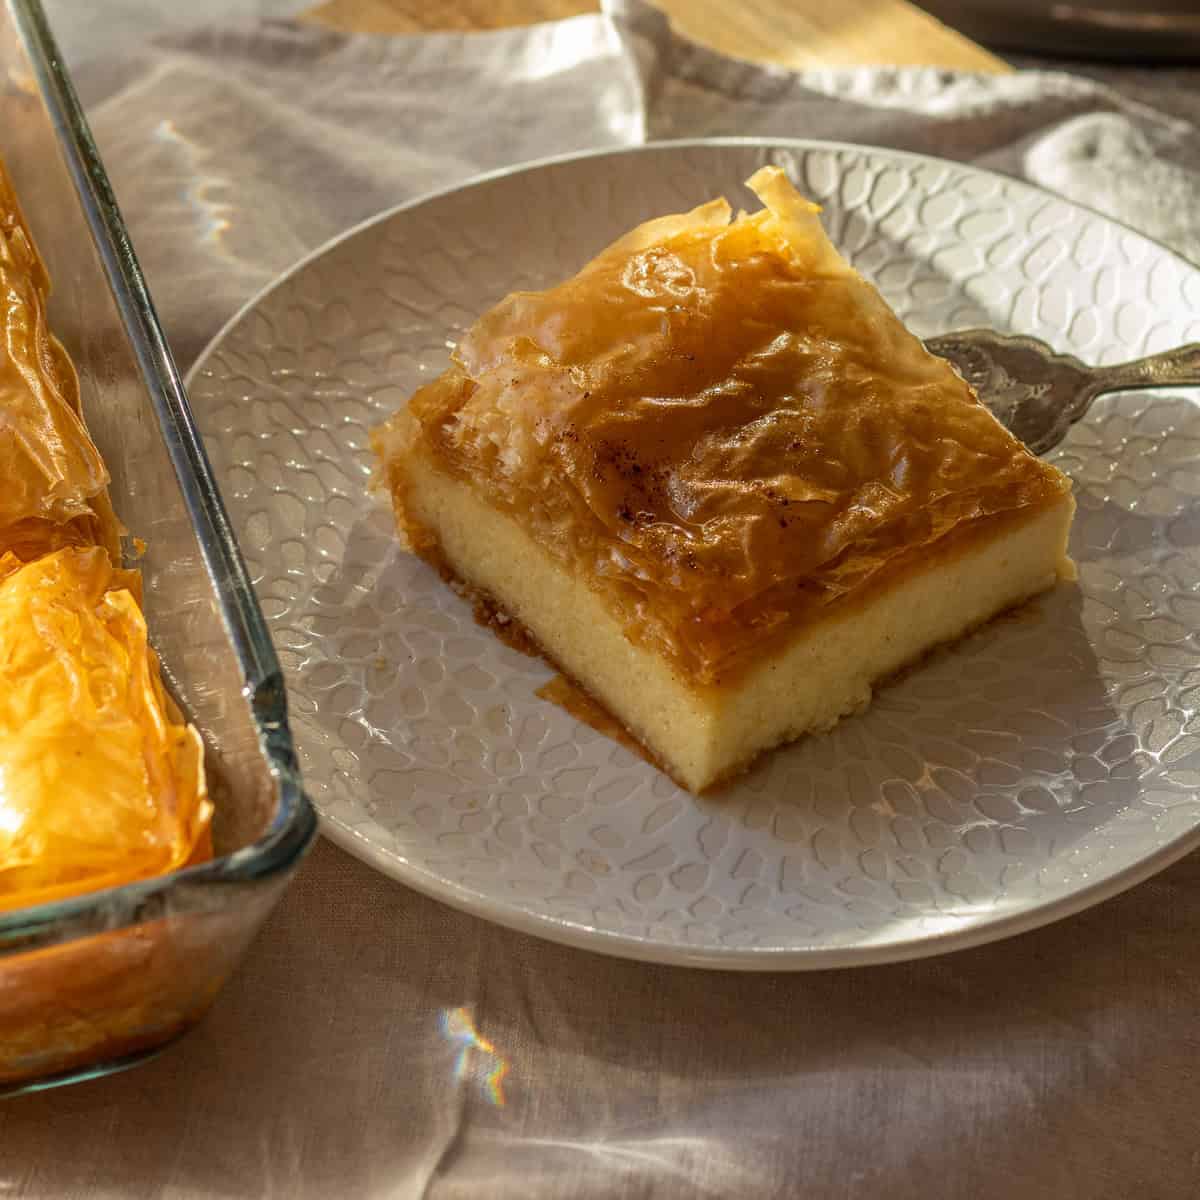
Bake the kadayif in the preheated oven for 35 to 40 minutes, or until the top is golden brown and crisp. Do not take it out while it still looks pale. A properly baked kadayif has a better texture once the syrup goes on.
Remove the tray from the oven and immediately cut the hot kadayif into 12 pieces using a sharp knife. You can cut it into squares, rectangles, or diamonds.

Pour the cooled syrup evenly over the hot kadayif. Cover the middle, edges, and corners so every piece gets syrup. You may hear a gentle sizzle as the syrup hits the hot pastry. That is exactly what you want.
Leave the kadaif at room temperature until it cools completely and absorbs the syrup. This usually takes at least 2 to 3 hours.
Do not cover the tray while the kadaif is still warm. Steam can soften the top too much.

Common Mistakes to Avoid
Using hot syrup on hot kadayif can make the pastry too soft and heavy. Let the syrup cool completely before the dessert comes out of the oven.
Not pressing the pastry layers firmly enough can make the pieces fall apart after slicing. The layers should be compact but not crushed.
Taking the kadayif out of the oven too early can leave the middle pale and soft. Wait until the top is properly golden before removing it from the oven.
Pouring the syrup over an unsliced tray makes it harder for the syrup to reach the middle of each piece. Slice the kadayif first, then add the syrup.
Covering the tray while the kadayif is still warm traps steam and softens the top. Let it cool uncovered before storing.
Recipe Tips From the Chef
- If using frozen kadayif pastry, thaw it slowly in the refrigerator overnight so the strands are easier to separate.
- Separate the pastry strands gently with your fingers and remove any clumps before adding the melted butter.
- Use enough butter to coat the pastry well, as dry strands can bake unevenly and turn hard instead of golden.
- Press the pastry layers firmly into the tray so the kadayif holds its shape and slices neatly after baking.
- Chop the walnuts or pistachios finely, but keep a little texture and avoid turning them into powder or paste.
- Pour cooled syrup over hot kadayif for the best texture.
- Slice the kadayif before adding the syrup so it can reach the middle and edges of each piece.
- Let the kadayif rest for at least 2 to 3 hours before serving, so it has enough time to fully absorb the syrup.
How to Serve Kadaif
Kadaif is usually served at room temperature with a generous sprinkle of ground pistachios on top.
It goes beautifully with Turkish Tea or Turkish Coffee. A small piece is usually enough because it is rich and sweet.
For a more special serving, add a spoonful of kaymak or clotted cream on the side. The creamy texture balances the syrup and works very well with the crisp pastry and nut filling.
You can also serve kadayif with vanilla ice cream or Turkish ice cream. This is especially nice when the dessert is freshly made and the top still has some crispness.
For Ramadan, Eid, or dinner parties, cut the kadayif into neat portions before adding the syrup, then garnish with pistachios just before serving.
Storage
Store kadayif at room temperature for up to 5 days once it has completely cooled.
The top is crispest on the first day. After that, the syrup slowly softens the pastry, but the flavor stays lovely.
Keep the pieces loosely covered or in an airtight container. Avoid covering the tray while the dessert is still warm, as trapped steam can soften the top.
I do not usually refrigerate kadayif unless the kitchen is very warm. The refrigerator can make the texture firmer and less pleasant.
Can You Make Kadaif Ahead of Time?
Yes, kadayif is a good make-ahead dessert because it needs time to rest after the syrup goes on.
You can make it several hours before serving or the day before. For the best texture, make it earlier on the same day and let it sit at room temperature until ready to serve.
Add ground pistachios just before serving so it stays fresh and bright.
Can You Freeze Kadaif?
Yes, you can freeze kadayif, but the texture will be softer after thawing. Place the cooled kadayif pieces in a single layer in an airtight freezer-safe container. If you need to stack them, place a small piece of parchment paper between the layers. Freeze for up to 3 months.
Thaw at room temperature before serving. The top will not be as crisp as freshly baked kadayif, but the flavor will still be good.
Recipe Variations
You can make kadaif with walnuts, pistachios, almonds, or a mix of nuts. Walnuts give it a more classic homemade Turkish flavor, while pistachios make it richer and more colorful.
You can add a small pinch of cinnamon to the nut filling if you like, but keep it light so it does not take over the flavor of the pastry.
Some versions use a small amount of rose water or orange blossom water in the syrup. This is more common in Middle Eastern-style desserts than Turkish homemade kadayif, but you can add a little if you enjoy floral syrups.
Recipe FAQs
Kadayif can become soggy if the syrup is hot, the pastry is underbaked, or the dessert is covered while still warm. Bake it until golden and pour cooled syrup over the hot pastry.
Let the kadayif rest for at least 2 to 3 hours after adding the syrup. This gives the pastry time to absorb the syrup and cool completely before serving.
No, kadaif and kunefe are different desserts. Kadaif is usually made with nuts and syrup. Kunefe has a cheese filling and is served hot.
Related Recipes
For more delicious syrup-soaked dessert recipes why not try:


Did you make this recipe? Please let me know how it turned out! Leave a comment below and tag @cookingorgeous on Instagram and hashtag it #cookingorgeous.
I hope you enjoy the process of making this delicious Kadaif Recipe (Turkish Tel Kadayif Dessert) as much as you enjoy eating it! 🙂
Want to Save This Recipe?
Enter your email & I'll send it to your inbox. Plus, get great new recipes from me every week!
By submitting this form, you consent to receive emails from Cooking Gorgeous

Kadaif Recipe (Turkish Tel Kadayif Dessert)
Ingredients
- 1 ⅙ lb kadaif pastry (500 grams)
- 7 oz butter (200 grams)
- 7 oz chopped walnuts or pistachio (200 grams)
- 1 ¾ cups sugar (350 grams)
- 2½ cups water (600 ml)
- few drops of lemon juice
- ground pistachio, ice cream or kaymak to garnish
Instructions
Prepare the Syrup
- Preheat your oven to 350°F (180°C).
- Grease a 12" x 9" x 2.5" / 32 cm x 24 cm x 6 cm baking tray with butter and set it aside.
- Place the sugar and water in a saucepan over medium heat.
- Stir until the sugar dissolves, then bring the mixture to a boil.
- Lower the heat and let it simmer gently for 15 to 20 minutes, until it thickens slightly.
- Add a few drops of lemon juice and simmer for another 2 to 3 minutes. Remove the syrup from the heat and let it cool completely.
Build the Kadayif Layers
- Unwrap the kadayif pastry and place it in a large bowl or on a clean tray. Separate the strands gently with your fingers and remove any clumps or knots.
- Melt the butter in a saucepan or in the microwave. Pour the melted butter over the kadayif pastry and mix well with your hands until all the strands are evenly coated.
- Place half of the buttered kadayif pastry into the prepared baking tray.
- Press it down firmly with your hands or the bottom of a bowl, making sure it covers the base evenly.
- Spread the chopped walnuts or pistachios evenly over the pastry.
- Top with the remaining kadayif pastry and press down firmly again to create an even, compact layer.
Bake and Soak in Syrup
- Bake the kadayif for 35 to 40 minutes, or until the top is golden brown and crisp
- Remove the tray from the oven and cut the hot kadayif into 12 pieces using a sharp knife.
- Pour the cooled syrup evenly over the hot kadayif, making sure to cover the edges and corners.
- Leave it at room temperature until it cools completely and absorbs the syrup, at least 2 to 3 hours.
- Garnish with ground pistachio and serve with kaymak, or ice cream.
Notes
- If using frozen kadayif pastry, thaw it overnight in the refrigerator before using.
- Separate the pastry strands well before adding the butter so the kadayif bakes evenly.
- Make sure every strand is coated with melted butter. This helps the pastry turn golden instead of dry.
- Chop the walnuts or pistachios finely, but do not turn them into powder or paste.
- Press both pastry layers firmly into the tray. This helps the kadayif hold its shape after baking.
- Use cooled syrup on hot kadayif for the best texture.
- Slice the kadayif before adding the syrup so the syrup can reach the middle of each piece.
- Let the kadayif rest for at least 2 to 3 hours before serving.
- Store leftovers at room temperature for up to 5 days.
- You can freeze leftover kadayif for up to 3 months. Let it cool completely, then place the pieces in an airtight freezer-safe container with parchment paper between layers if stacking. Thaw at room temperature before serving.


Sana says
Looks scrumptious! Definitely trying this soon.